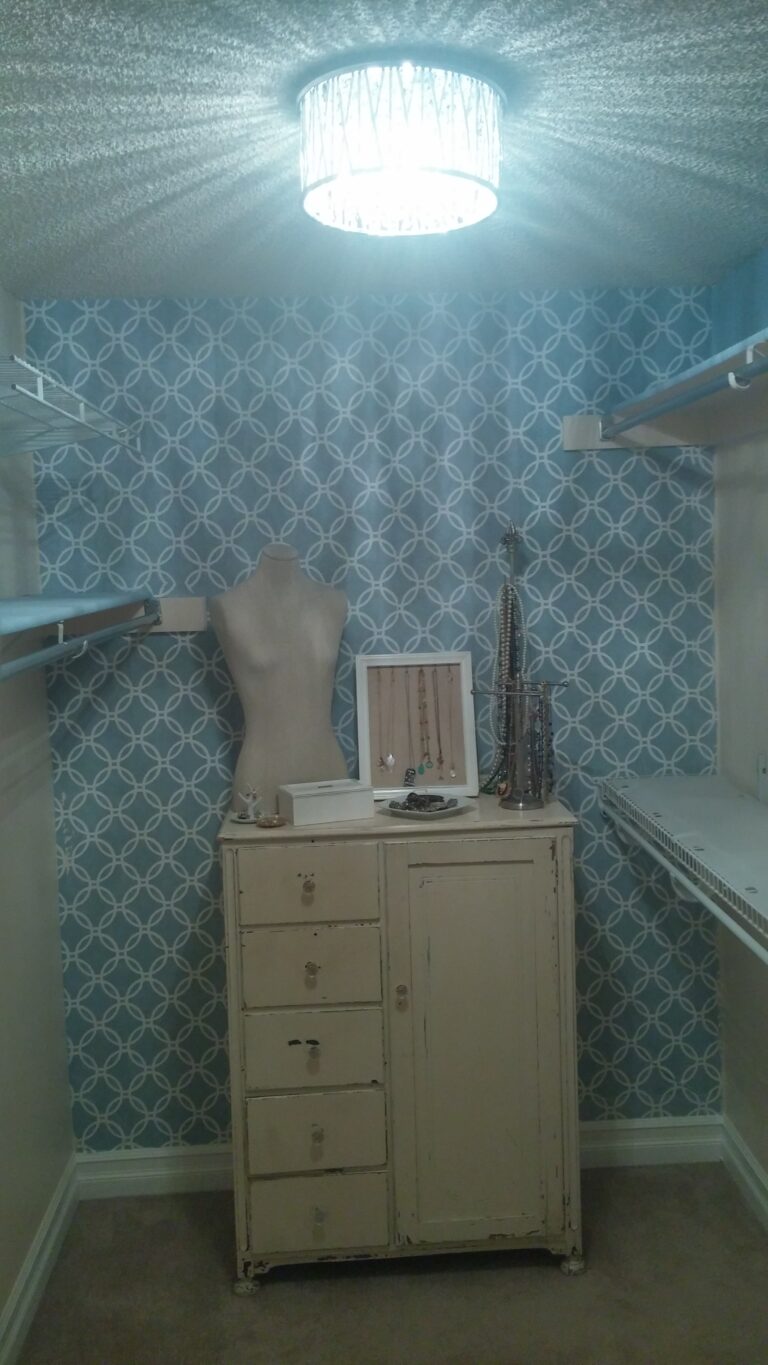
10 No Demo Reno Ideas to Uplevel Your Living Space!

No Reno Demo Photo

No Reno Demo Photo

10 No Demo Reno Ideas to Uplevel Your Living Space!

We are in the process of buying a new, old house in my hometown, which is the definition of small-town USA.  I love combing old and new in my decorating style and home decor projects. My “new to me” house is going to be just that.  Old according to most people’s standards, but new to me.  It was built in 1890.  Has been a staple house on “Main Street” since before my mom was even a thought in my Nana’s mind.  It has always been considered a stately home and I’m so excited to bring it back to its glory days, but with my own personal stamp on it.

I love to watch all the “Renovation” shows on all the channels, HGTV, FYI, Magnolia Network used to be DIY, and even the British channel DABL. I get GREAT ideas this way and have tried many of them in our many homes.  We move a lot.  Below you will find my top 10 No Demo Reno Ideas to Uplevel your Living Space. Most of them are super budget-friendly and you may be able to do them in a rental property with your landlord’s permission, of course!

Ten Ideas that will make your living space look expensive & stylish without breaking the bank!

  1. Replace your old Boob lights!  Most builders, flippers, and even landlords install the standard Home Depot or Lowe’s, lower-priced lights also known as boob lights or nipple lights.  I replaced all of our lights on the main floor except for 3 (2 were ceiling fans that I actually like. And the hallway light, it’s vintage and I love most things vintage) in our Colorado home.
  2. Rehang your curtain rods to just below the ceiling.  This adds height to your lower ceiling rooms.  Yes, you will need longer drapes, but if you don’t love your current drapes, wait until there is a drapery sale at your favorite big box store and then go shopping for the drapes (95 inches is probably a good length for drapery just below the ceiling) of your dreams.  Did you know that in Victorian times, if you had extra fabric hanging at the bottom of your curtains or draperies, it was a sign of wealth?!  So let the extra drapery fabric hang down and pool on the floor!  It not only will show your good design taste but your abundance and wealth!
  3. Paint…paint will spruce up just about anything.  I have painted the old, dingy, and scratched wooden vanities in my bathroom’s more than once.  The most recent vanities I painted a crisp shiny off-white, and I also painted the dark wooden mirrors that hung above the vanities.  Both vanities have built-in counter/sink combos that were in decent shape, so painting them, up leveled the vanities a bit.  It definitely made both of my bathrooms appear lighter and airier, which is what I was going for.
  4. Upgrading your cabinet and vanity hardware.  New hardware will uplevel the look of even builder-grade cabinets.  After I painted the vanities mentioned above (and I’ve done this with painted furniture too), I added new hardware.  This made the vanities look like they were brand new!  What a budget-friendly way to make a big change with just a little time and elbow grease.
  5. Upgrade your old showerheads.  This is a super easy switch and will make showering feel so much more luxurious.  Showerheads come in all different styles and sizes.  You can have a massaging showerhead.  You can have a rain shower head.  You can have a brass or gold-looking shower head for a super high-end look.  Brass and gold fixtures are back in style!
  6. Paint…more things to paint!  Paint or whitewash your old brick fireplace and change out the mantel, depending on the style you are going for.
  7. If you don’t use your fireplace as a traditional fireplace and you don’t have the budget to convert your wood-burning fireplace just yet (like us), you may love this idea!  Clean the firebox and then fill it with different-sized battery-operated LED flameless candles (the ones you can set on a timer or use a remote work best).  Then as evening approaches and the light is fading outside, your LED flameless candles will put off an amazing glow and give a great ambient light that will be perfect to relax with as you are settling down for the evening.   This was one of my favorites and a super easy trick I did in our Colorado home.
  8. Don’t compete with the countertops that you don’t love. Instead, enhance them or compliment them with a new backsplash.  Subway tile is all the rage right now and creates a timeless look.  There are lots of different types of tiles or self-adhesive sheets of tiles that you can choose from.  I selected a porcelain tile that is in different shades of beige, from light to dark.  It almost has an Ombre look.  I love how it turned out and it was very affordable.
  9. Wallpaper, but not traditional wallpaper.  There are so many peel-and-stick wallpapers to choose from now.  You can look online and order enough peel and stick wallpaper to cover one wall – think feature wall or to cover an entire room.  Wallpaper is making a comeback and is very popular in powder baths, dining rooms, and primary bedrooms again!  I used peel-and-stick wallpaper to uplevel my walk-in closet.  It turned out amazing and I LOVE it!
  10. Create a Gallery Wall!  If you are like me, you have so many photos of your kids or family and you don’t know what to do with them all.  I love to thrift and shop at off-the-wall shops that have unique and very pretty photo frames.  I have collected quite an assortment of photo frames over the years.  Instead of being matchy-matchy, I used all of the frames I’ve collected over the years and made my very own unique and eclectic Gallery wall in our family room.  On top of family photos, I included some art and quotes that I also love.  If you like a more streamlined look, you can go to a big box store and buy all matching frames in the different sizes you need and then plan your gallery wall using a grid.  The easiest way to plan your gird is to use craft paper.  Trace the frame sizes and then decide where you are going to put the frames on your wall.  If you use the craft paper with scotch tape, you won’t have multiple holes if you don’t love the way you design it the first time.  Another tip is to use the Command Strips that you can remove up to 3 times before they aren’t sticky any longer.  I use Command Strips all of the time and love that my walls aren’t damaged or have multiple nail holes everywhere!

There you have it!  Ten super easy and cost-effective ways to up level your home without having to do a complete remodel.  I’d love to see your before and after photos and I will be adding photos of our new home with before and after photos of any of the projects that I do.  Think Mid-Century Modern with an eclectic spin.  Stay tuned for more on this exciting new project!


Family Heirloom Updated with Chalk Paint!

Chalk Painted Family Heirloom Hutch

I love to re-use, re-purpose, and re-do furniture! I’ve never painted a piece with Chalk paint before. I wanted to, but I thought it would take a lot of time that I just don’t have right now. You can imagine my surprise and overall feeling of complete gratification when my friend, Donna, recently visited and offered to not only help me but show me how to do it! Check out my family heirloom updated with Chalk paint!

The piece of furniture we chalk painted is a family heirloom. I don’t know exactly how many years, but I’m thinking at least 40 or 50. My grandfather actually made this piece of furniture at the furniture company he worked at. It has a table and four chairs to match, but that particular piece was lost about 20 years ago in one of my many moves. Remember, I’m a Navy Brat, so I used to move a lot. And…when I say a lot, I mean a lot. I lived in 17 places over a ten year period in my 20’s. I have finally settled down and am loving it! Excuse my off-track moment, but I wanted you to understand the true meaning behind the word move for me. I always keep the hutch with every move because it provides storage, no matter the size of my living space.

The furniture company my Grandfather worked at was, Fancher Furniture Co., Inc. Fancher Furniture was created in 1911 and operated until 1997 with the company being formally dissolved in 2003. Unfortunately, Fancher Furniture never really thrived, but they did offer my Grandfather a job that he loved and walked to for many years. I think my grandfather would be impressed with how my family heirloom hutch updated with Chalk paint turned out!

The Hutch that my Grandfather made before I updated it with Chalk paint!
Bottom of hutch before!
Before top of hutch

Products we used on my Family Heirloom Hutch update

I usually have a couple of ACE coupons on hand. You know the “Ace is the Place” Hardware store. Call to make sure they have what you need before you head out. With the pandemic, lots of people are updating their homes inside and out. You could go to a hardware store only to be disappointed that they are out of stock of what you went for. So…before we got started, I called to check. They had what we needed in stock. We headed there straight away to buy a small can of chalk paint. I already had sandpaper and the wax we needed. I also wanted to get a couple of new drawer pulls, so I took the old drawer pulls off and measured (before leaving for Ace) so that I could get the right size of pulls while we were there.

Things we had to buy:

  1. A 30 oz can of Rust-Oleum chalked paint in Serenity Blue
  2. An 80 grit coarse sanding block
  3. Two new drawer pulls cost about $3.00 each. I already had nice knobs for the doors, so I just re-used those.

Things I had on hand:

  • Three different sized paint brushes
  • A couple of pieces of cheesecloth
  • A Shamy
  • A can of clear chalk paint wax – I bought this a year or so ago and it was still good, so we used it.

How much did it cost?

The cost for this entire project was only about $33 with tax. I did already have some of the stuff we needed to use at home though. If you don’t have everything needed to complete the project, you may have to spend a little bit more.

It took us two separate nap times to finish the project with drying time, waxing time and decorating time. So in total time spent, it probably took us a total of about 3.5 hours from prep to completion. It was super fun to do this with my dear friend. We talked and laughed while we both worked on the piece. She showed me how much fun this can be. Now I want to paint at least three more pieces of furniture in my house. I’m thinking of how I can maybe find free furniture to paint and then try to sell or give away down the road. My friend may have created a chalk painting monster! Ha!

It really was easy to update my family heirloom hutch!

I’ve talked about how easy it was, so let me tell you the step by step easy way we did this. If you want to run out to your local Ace Hardware store this weekend to buy what you need, you’ll know what to pick up ! ?

Chalk Painted Family Heirloom Hutch
After full hutch with the new drawer pulls and knobs for the doors that I already had on hand.

Step by Step how to update your family heirloom piece

  1. First, we took everything out and off of the cabinet. Then we moved it (it’s two pieces, so moving it was easier than it looks) to the sunroom. We put both pieces on a clear plastic shower curtain that I had in the garage. I’m not sure why I had that clear plastic shower curtain in a tool drawer in my garage, but I’m sure glad I did!
  2. Once the piece was separated and there was enough room between the now two pieces, we used a clean damp Shamy and cleaned the piece really well. I even took some Q-tips and cleaned in between the dental detail on the front of the cabinet. I was sure to get all of the dust off. I knew it wouldn’t look good if we just painted over the dust!
  3. When it was completely clean, we each started painting. You really can’t mess it up. You just paint with even strokes and try not to paint too thickly. If you don’t apply enough the first time, you can just go over it again when it’s dry. Chalk paint dry’s pretty fast, especially here in Colorado where the climate is really dry.

We kept our strokes light and airy

  1. We wanted the final result to be a little distressed looking. We ended up only doing one coat of paint on the entire piece except for the back of the top piece that the shelves are in front of. That part of the piece is more like paneling, so it is coarser than the wood of the cabinet. I ended up needing to put another coat on the paneling part and then when it was dry, sanding a little off in the grooves.
  2. When the piece was completely dry, we went around and roughed it up a bit. By “roughed it up” I mean we sanded some of the edges and around the detail areas. It shows the wood through and I love the look. Then we cleaned the dust from sanding with another clean damp Shamy.

Wax goes a long way

  1. After the piece was completely dry and clean, we used the clean cheesecloth to apply an even coat of the finishing wax to the top and the shelves. We didn’t wax the entire piece, just the parts that I would be dusting or wiping down often. The wax gives it a shine and smoother finish. A little bit of wax goes a long way too!
  2. Finally, we installed the new drawer pulls and the old doorknobs again. We moved it back inside. Loaded it back up with the stuff that was inside before we started but organized the contents a bit more and then decorated the shelves.

I re-did this on a 1950’s China hutch, but you can use the steps above to basically Chalk paint any piece of wood furniture that you have on hand or may pick up miraculously after reading this.

Don’t just take my word for it

If you are more visual and like to see how something is done rather than reading about it, check out this great video I found from DIY Deanna on YouTube. Deanna shows how easy it is to Chalk Paint furniture on her channel. It really is soooo easy!

The feelings around the final outcome of my family heirloom hutch update project!

I have such feelings of satisfaction, pride, and love around this project. I love how it turned out. I love that my friend was excited and on board to help me with this project during her visit. I love the quality time we got to spend together doing this project. I love that we both really enjoyed doing this together. I love that we now have one more thing in common to talk about when we visit or just have a phone catch up! I love that we were able to update a piece that has been in my family for years and now will continue to live on for years and years to come. I feel that my grandfather would be very proud of me and love the way I updated my family heirloom. I’m sure he’s smiling down on me for this one!

What would you like to chalk paint in your house? Leave me a note in the comments or better yet…take a before and after photo of the piece, you update with chalk paint. I’d love to see your before and after projects!


How to Make Easy Garden Stakes Using Things You Have at Home

When we moved into our new house, the previous owner had this very scary-looking shade cover sail that was anchored by two metal beans that went up and over towards the house. The previous owner was a welder, so he welded this shade structure himself. When we were about to close on the house and still negotiating a few things, we asked him to remove the metal posts (they were at least 12 feet into the air and swayed in the wind big time) before we moved in. We didn’t think to ask him to remove the metal boxes that they were anchored in. I honestly thought we would be able to move them to a different part of the yard and use them as great garden and flower boxes. Little did I know until I recently cleaned them out that they are filled with heavy steel. That’s what kept the other part that he removed from crashing into the house. My mistake!

It turns out that they are way too heavy for us to move them ourselves and we don’t have the money to pay someone to move them for us or to rent a piece of heavy equipment to try to move them ourselves. Plus, honestly, I’d never trust myself or my husband to take on a project like that. I know we would either get hurt or crash something into our house. We aren’t skilled in this type of work, so I decided to make them work to the best of my ability right where they are.

Getting the garden beds ready has taken me some time. I spent most of the day last weekend, cleaning out both garden boxes and refilling them with garden soil. I turned one of the boxes into a flower bed and transplanted all of the flowers (they were spread between both boxes) into one and added a few more that I love. Zinnia’s and Marigold’s are two of my favorites because of the bright colors. An added benefit of planting Marigolds, supposedly squirrels and rabbits don’t like the way they smell so they won’t eat your other flowers. I sure hope this is true because I spent a lot of time planting really pretty flowers that I want to enjoy all summer long.

I got so excited about having space to actually plant herbs and vegetables, that I got off track for a minute. I am excited to show you how I made these really cute garden and herb markers out of things I already had at home. I didn’t buy anything for this project. I spent 0$ on the actual project (not including any gardening soil, herbs, or vegetables purchased for the actual garden) and that makes my husband very happy. He doesn’t like my DIY projects when they end up costing money. If I can do them for free, using things we already have on hand, he’s a very happy man! I did this project during nap time and it took me all of about 40 min’s to make 16 garden markers and 4 herb markers. They were super easy and fun to make!

Finished garden stakes

I got my drill out for this project. I love when I get to use power tools for a project. Here’s a photo of what I used and a list of the things I had on hand to make these:

Supplies I used for this project

List of items that I already had on hand and used for this project:

  • Wine corks – I save these and have been wanting to use them for a project, so I’m super excited that they went to good use for this one!
  • BBQ Skewers – we had these in our drawer leftover from a dinner I made last summer.
  • A Sharpie Pen – I used a red one for most of them but then did a couple in black to see the difference. I think I like red the best.
  • My handy dandy drill – I love it when I get to use power tools even for just a few minutes!

Supplies I used:

How I made them & what I used:

  1. First, write the herb name or vegetable on the corks
  2. Second, use the second smallest bit I have and drilled a hole into the end of the cord that had wine color on it or where the wine opener left its mark. I drilled about halfway through the cork to make sure the cork will stay on the skewer.
  3. Thirdly, insert the skewer into the hole I just drilled into the cork and I repeated this 15 times!
  4. I used the BBQ skewers for the garden markers and I used leftover unused chopsticks (from a recent Chinese food take-out order) for the herb markers. I didn’t think I needed the herb markers to be as tall as the garden markers. Once I get everything planted, I’ll see if this is true.

I love how these turned out so much that I’m going to make some as gifts for some friends. I’d love to see what you are working on outside, in your garden, or just in an hour or two when you have time to tackle a new project. If you make your own garden markers that resemble the ones I made above, please share a photo or note in the comment section below. I love to hear from my readers and connect!

Create the Perfect Mini Office in an Unused Corner of Your Home

In my first Nap time DIY Series I showed you how I was able to simply and easily transform our fireplace mantel with some paint that we already had. This week, I’m showing you how I turned an unused corner in my living room into an amazing mini office for myself. I LOVE it! I have the separation I need to get some work done, but I still feel like I’m part of the family when I’m in the corner working.

Now that my husband is working from home full time, due to the Coronavirus pandemic, I needed to find a space where I can do my work. He has taken over what was supposed to be our shared office in our “new to us” home that we purchased and moved into this past fall. I don’t work at a desk all day as my husband does, but I do need a comfortable space to be able to get some work done for an hour or two each day. Some days, it’s writing blog posts, creating images to use on my social media sites, and other day’s it’s writing cards or paying bills. It doesn’t really matter what I need to do, I just need a space to call my own and to be able to work on whatever I need to work on. I have successfully created that in this amazing mini office, in the corner of my living room.

Unused corner of living room “Before”!
Finished mini office in living room “After”!

I found this cute little, one drawer light blue wicker desk with a beautiful wood top and gorgeous crystal pull on the drawer, at an Antique shop in Wheat ridge, Colorado. The shop is more of an Antique Mall, with many vendors in the same building selling unique items. I love it when I come across stores like this and find unique things that will be new to me and I will love.

To get the desk ready to use, all I had to do was polish the top of the desk. It was almost perfect when I brought it home, but I felt like I needed to shine it up a bit. To do that, I use, Feed n Wax Wood polish by Better Bee to clean and polish all of my wood surfaces. I LOVE this product. It cleans the surfaces and then when you use a soft cloth to go back over it to get any excess oil off of the wood, it leaves a beautiful shine on the wood. Amazingly, this also helps keep the dust down. Colorado is very dry and we tend to have a ton of dust, so it shines it up and helps you to have to not have to dust as often. Win-win!

I didn’t have to do too much work to get the corner ready since it was pretty much empty all ready. I did take down the wine themed framed art from the wall and moved it to our basement, where it fit in more in our game area. My Mother-in-Law found the Mason Jar themed art work while she was out shopping (before the stay at home orders went into effect) and gave that to me as a gift. I love it in the new corner mini office and it goes with the rest of my furniture and art work in the living room. I did recover the chair so that it matched better. The chair was really pretty but the fabric that was on the seat just didn’t work for the look I was going for.

Recovering the chair took a few tools and a little bit of time, but over all, it wasn’t that hard to do. I did need another set of hands to help me pull tight as I was stapling the fabric into place on the back side of the seat. Especially when it was time to maneuver and staple the corners. Corners can be tough. I find the best way to do them so they don’t bunch is to fold the corner almost like you are wrapping a present and then staple, pull tight, staple again and repeat until you get it the way you want it to look. You want to try to have smooth, tight corners. If you can’t get them perfectly the way you’d like them, don’t stress, most likely no-one but you will even notice if it’s not perfect.

Here’s a list of the materials I used and you will need to recover a cushion on a chair:

  1. You will need a chair that has a cushion that needs to be recovered. Duh! Thanks, Captain Obvious! Ha! 🙂
  2. Safety goggles or eye protection.
  3. The fabric you plan to use to cover the cushion. I usually get a little bit more than I probably need to cover it just to be safe. If you measure the seat (width and length) the fabric store should be able to help you figure out exactly how much fabric you will need. Upholstery fabric is a bit more expensive than other regular sewing fabric, so you don’t want to have to buy more than you really need.
  4. An Iron and Ironing board, to iron the fabric before you start to cover the seat and staple it in place.
  5. A staple gun with at least 1/2 ” staples. In the video I share below, she uses a pneumatic staple gun, but I use a traditional staple gun. Your choice!
  6. A piece of foam cut a little bit smaller than the seat to add a little extra softness to your cushion. If it’s an older chair the foam or batting in the cushion has most likely worn down. Getting a new piece and cutting it to size or asking at your craft/fabric store for them to cut it for you, will make it much easier when you are ready to start your project. The foam goes on top of the seat, under the new fabric you are going to staple on to the seat.
  7. A round screwdriver to unscrew the seat cushion from the chair and then re-screw the cushion back on after you have created your new upholstered masterpiece! You will need a flathead screwdriver to remove the old staples from the seat, to remove the old fabric before you get started with your new fabric.
  8. A pair of fabric cutting scissors. A pair of sewing scissors work best. You will need these to trim your fabric when you start stapling and will most likely need them for the corners so you don’t get too much fabric built up.
  9. A sense of humor! You probably aren’t going to do it perfectly the first time and that’s OK! Just know that this, as with anything, will just get better with practice. Or you can watch a “how-to” video, like the one below from Homes.com, so that you are more confident as you embark on this project. The video is short and easy to follow along. I use “how-to” videos all of the time to help me navigate my projects.


Supplies needed for project

Chair with recovered seat cushion, “After”. I LOVE it!


As you can see, I really had fun creating this new workspace for myself. I also love that when I’m not using it, it’s very pretty and goes well with the rest of my decor in my living and dining rooms. My friends have told me, “It’s very Meg looking!”. That always makes me smile. I obviously have a style that is unique to me, so much so, that my friends notice things that they think I would like to have in my house when they are out and about and often send me photos or tell me about them later. This has helped me decorate all of my homes in an affordable and eco-friendly way.

Next week, I’ll be sharing how I used photo frames that I already had, along with a couple of other pieces of art that I just love to create a really special “Gallery Wall” in our family room. It was so easy and took me less than an hour to hang everything up, even with a few moves & modifications (thank you command strips!). I have been putting this project off because I thought creating a “Gallery Wall” would take a ton of time. I envisioned having to cut out craft paper the size of the frames and taping that paper all over the fall to get the spacing and sizes of the frames right. Nope! It was so much easier than that and I can’t wait to tell and show you how easy it truly was. So tune in again next Thursday for this one. After that, I will be talking about some post-pregnancy medical things that have come up for me recently. I’m sure other mid-life moms will be able to relate that post.

What home projects are you currently working on or completed? I’d love to hear about them, even if they didn’t turn out as perfect as you’d like. I especially want to hear about any home projects that you are really proud of and were able to do in a timely manner, like my nap time DIY projects. Please leave a comment below and post photos if you have any. Photos don’t lie and will show off your beautiful project in a way words sometimes simply can’t convey in the same way.


Simple & Easy Do-Over for Your Fireplace Mantel

Time is something I don’t have much of these days, so Nap time is when I get any of my projects done!

With one year old twins, my time for any kind of projects, especially, DIY decorating or updating my house projects are limited and honestly, had been put on the back burner. Now with our “stay at home orders”, I have more time to work on DIY projects, which has been a bit of a blessing for me. I love decorating and recreating things I find at thrift and antique stores.

Our twins currently take a long nap in the morning and a shorter nap in the afternoon. Keeping them on a great schedule and having my in-laws here has given me the time I need to get things done. I use this time to take care of myself, eat, connect with friends and family and clean up my house most days. See my article about five things I do every day to be and stay happy. Here and there, instead of doing my “normal” routine, I take advantage of nap time to tackle a random DIY project. This series will talk about and show you the DIY home decorating projects I’ve been able to tackle and complete during nap time.

For my Nap Time DIY Projects I try to stick to things that I can realistically get done in an hour and a half to two hours max. Otherwise, I have to wait until my husband isn’t working (he’s working from home now, but he’s working, so he can’t exactly help me during business hours) and can either go for a long walk with the twins or play with them so I can get my projects done. For the shorter projects I like to get them done in one day. I get so much satisfaction from completing something and having it turn out better than expected in just a couple of hours.

My first Nap time DIY Project in our new house was to paint our fireplace mantel in our family room. It was a really dark grey and with the dark brick on the fireplace, it made the whole room feel very dark and out dated. I eventually want to re-do the entire fireplace and replace the brick with a tile and take out the very large, over sized hearth, but for now, just updating and brightening the fireplace mantel is a great start!

I didn’t want to spend a bunch of time or money on this project. We are planning to completely re-do the fireplace and convert it from wood burning to a gas insert, at some point, so spending a bunch of money and time on it is out of the question for now. We also, just renovated our basement and painted all of our new doors (in the entire house), so I had some nice white paint left over that I could re-use. I used what we had in our storage area already and since it’s so dry here in Colorado, I was able to brush the first coat on the mantel and step away to work on another small project. I let it dry while I put one coat of paint on the half wall in my living room to also freshen that up a bit. Thankfully, the half wall only needed one coat & dried super fast. The half wall was a project we were going to have our handy man do the next time we have him come out (we have other outside projects that we need his help with still) but I saved money and time by doing it myself. Bonus!

The family room & fireplace mantel before

You can see in the before photo that the room isn’t that large and the fireplace is the focal point. The furniture and art work in the above photo is the previous owners. I didn’t get a good “before” photo of the room before I got started on this project so I’m using the one that was used for the real estate photos when the house was on the market (when we purchased it). I think the “before” photo compared to my “after” photos shows how I turned this room that didn’t have much personality into a family room that is cozy, comfortable and full of love now!

Family room mantel after decorated for St. Patty’s Day
Full view of family room


By using paint we already had, I was able to save money and time. I did this entire project in about 3 hours total. I started it during nap time on one day and was able to decorate the mantel during nap time the next day. Plus I had time to freshen up the half wall in our living room. It’s just a wood cap that is painted white on the half wall that goes around the stairs to our basement. It’s not that exciting to look at and I didn’t get a before photos, so I’m not including a photo of that. It’s just to let you know that I had time for more than just this one project on the day I got stated. The steps I took for this project are below:


  1. I took everything off of the mantel
  2. I cleaned the mantel really well. The climate is really dry in Colorado, so dust can be a problem here
  3. I used a gallon of white paint that we already had in our storage room left over and a new paint brush that I had purchased a while back but never used
  4. It took two coats of paint and a very little amount of touch up when it was completely dry to finish this project
  5. While the first coat on the mantel was drying I painted one quick coat on the half wall in my living room. When I was done with that, the mantel was dry enough for a second coat. I finished the second coat and had time to do a few touch ups here and there, then wash the paint brush before the twins woke up from their nap.
  6. The next day, when I knew for sure the mantel was completely dry, I decorated it for St. Patrick’s day. I decorate my mantel for each season/holiday. Right now it has a couple of Easter bunnies on it with some of our normal decor. I don’t have much Easter decor so it’s not photo worthy, in my opinion. I hope to be able to get some more Easter decor on sale once we are no longer on “stay at home” orders. That way, next year I’ll have a plethora of bunnies to display for Easter!

I love to decorate and do all kinds of DIY projects. Since having the twins, they take up the majority of my time, so, my projects until we were put on “stay at home orders” were on the back burner. Now that I have some extra time, my husband is working from home and my in-laws are here, I’ve had more time to get some of those back burner projects done. My in-laws help me either with the twins or my projects. My father-in law is great. I just have to tell him what to do or where to hold something and then I can get it done. I love that they don’t mind helping out while they are here. Our new house is coming together beautifully and becoming our home that our twins will love to grow up in.

What DIY projects are you working on while your kiddo’s nap or are doing their online studies? Are you finding extra time to do some of your “on the back burner” projects during this crazy “stay at home” time we’re all in? I’d love to hear about your projects and even see some before and after photos. I reply to all (legitimate) comments and really do love hearing from my readers. I hope you and your family are using this extra time to bond, eat home cooked meals and come up with fun, creative things to do as a family together. We are making the most of it for sure.

The next Nap time DIY projects I’ll be writing about are how I created my own version of a Gallery Wall in our family room and how I created a much needed mini office for myself in our living room. Stay tuned…

If you aren’t on my mailing list, please subscribe. I’m starting a newsletter that I will send out weekly, as I publish new articles. If you are on my list, you won’t miss any of my upcoming published posts. Until next time, please take care and stay healthy!

DIY…update the look of an old cane chair with a fabric re-upholstery project!

Since we’ve moved, I’ve been in major DIY mode. I have this great old cane chair that I love, but it needed a fresh new look. I have changed the colors and theme of my bedroom and that’s where I keep the cane chair. It was covered in a fabric from about 10 years ago’s look and colors of my bedroom back then. I took a photo of my new quilt and off I went to the fabric store. I found a great complimentary upholstery fabric and bought 2 yards. I wasn’t sure how much fabric I would really need. I ended up not needing that much, but it’s more than ok that I got extra fabric. I plan to make a matching pillow, so more fabric turned out to be great!

To do this project, I needed some other tools. I used an iron, ironing board, screwdriver, staple gun, staples for the staple gun, sewing scissors, and a hammer. Once I gathered all of the tools, I got to work.

Tools and fabric:

First I cut the 2 yards of fabric down to 1 yard.  Then I ironed the yard of fabric I was planning on using to recover the chair seat.  I turned the fabric upside down on my living room carpet and then figured out which direction I wanted the shape on the fabric to be.  Vertical or Horizontal.  I chose Vertical, just for aesthetics.  I think it looked better vertical.  Then I carefully started wrapping the fabric around the seat, rolling the edges of the fabric under as I stapled. I started on the sides first, as the corners a bit more difficult to navigate, especially if you haven’t done much DIY re-upholstery projects.

When you get to the corners, you may have to cut some of the excess fabric off and then fold it creatively.  You may need someone else to help you hold the fabric taught so you can staple it into place.  I managed to cut, then fold it creatively, hold and staple by myself.  This takes a little practice though.  Give it a try and if it doesn’t work, you can always use some pliers to take the staples out and do it over again.

Once I had the seat of the cane chair, completely covered and stapled to my liking, I then set the seat on the chair to see how it looked.  I originally was going to chalk paint the chair, but I really liked the antique look of the chair color against the cream and orange of the seat fabric.  I decided to leave the chair the color it was instead of painting it.  I will use the chalk paint and wax for another piece of furniture soon, I promise!

Here’s the final outcome.  I love how it turned out!  If you’ve done a DIY project that you are proud of, please comment below with any photos of your project. I’d love to see what other people’s DIY projects are and how they are doing them, with any tips/tricks you may like to share.

Upcylcled Cain Chair
Recycled Cane Chair

Upcycled Cane Chair with pillows