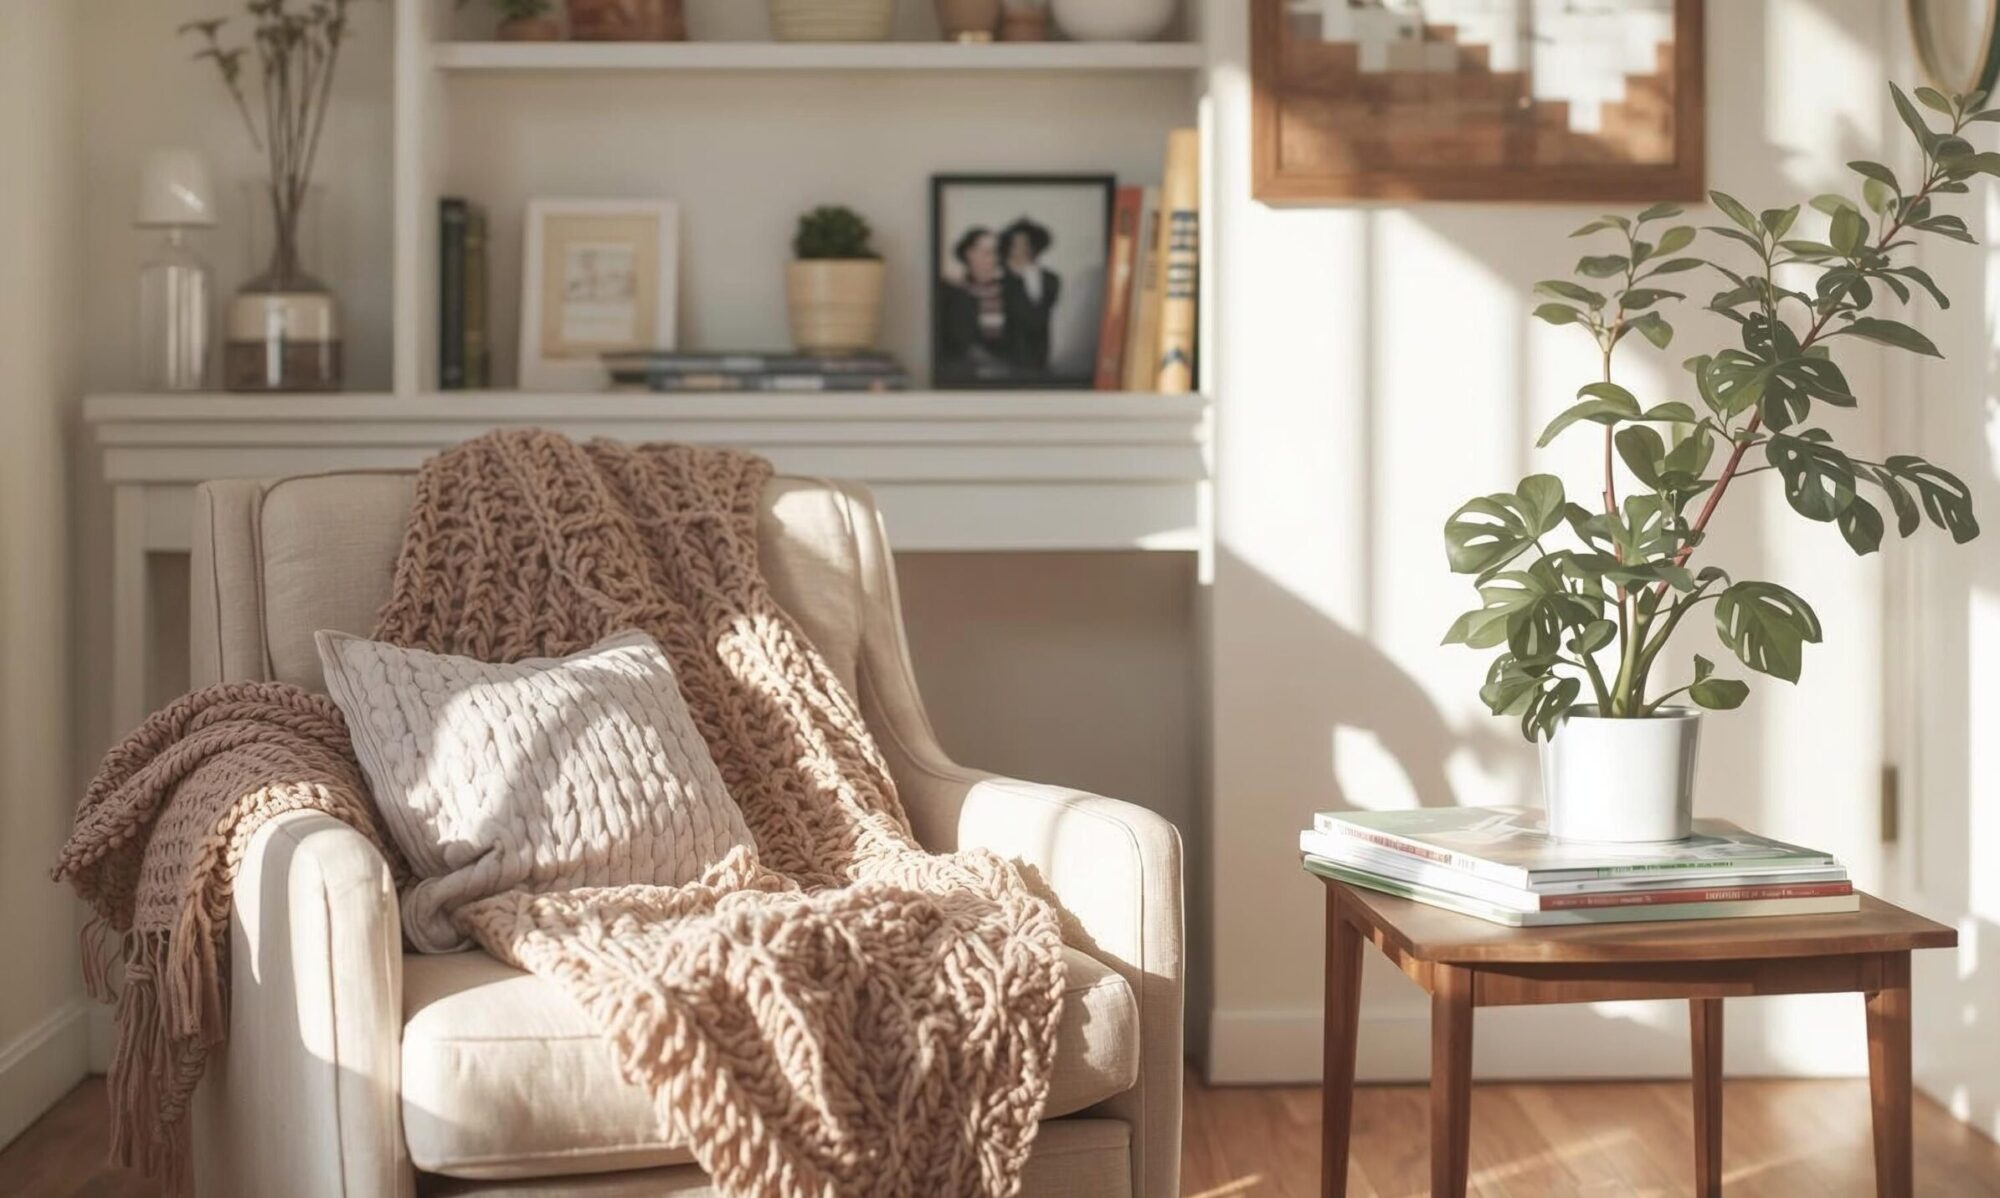
10 No Demo Reno Ideas to Uplevel Your Living Space!
We are in the process of buying a new, old house in my hometown, which is the definition of small-town USA. I love combing old and new in my decorating style and home decor projects. My “new to me” house is going to be just that. Old according to most people’s standards, but new to me. It was built in 1890. Has been a staple house on “Main Street” since before my mom was even a thought in my Nana’s mind. It has always been considered a stately home and I’m so excited to bring it back to its glory days, but with my own personal stamp on it.
I love to watch all the “Renovation” shows on all the channels, HGTV, FYI, Magnolia Network used to be DIY, and even the British channel DABL. I get GREAT ideas this way and have tried many of them in our many homes. We move a lot. Below you will find my top 10 No Demo Reno Ideas to Uplevel your Living Space. Most of them are super budget-friendly and you may be able to do them in a rental property with your landlord’s permission, of course!
Ten Ideas that will make your living space look expensive & stylish without breaking the bank!
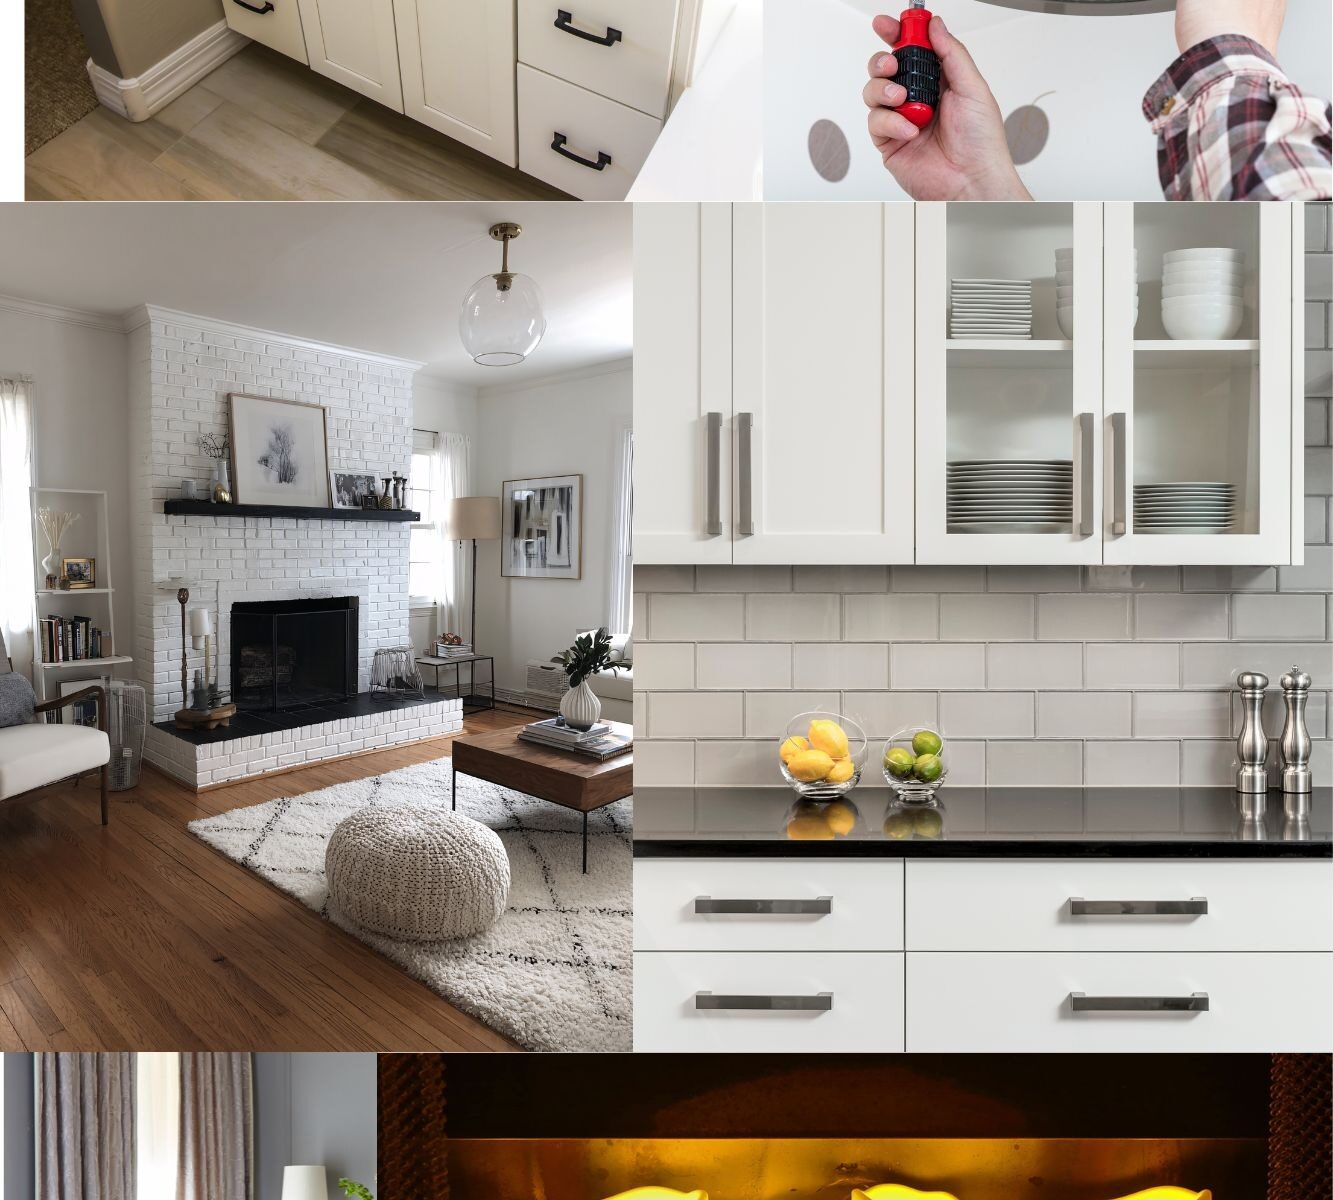
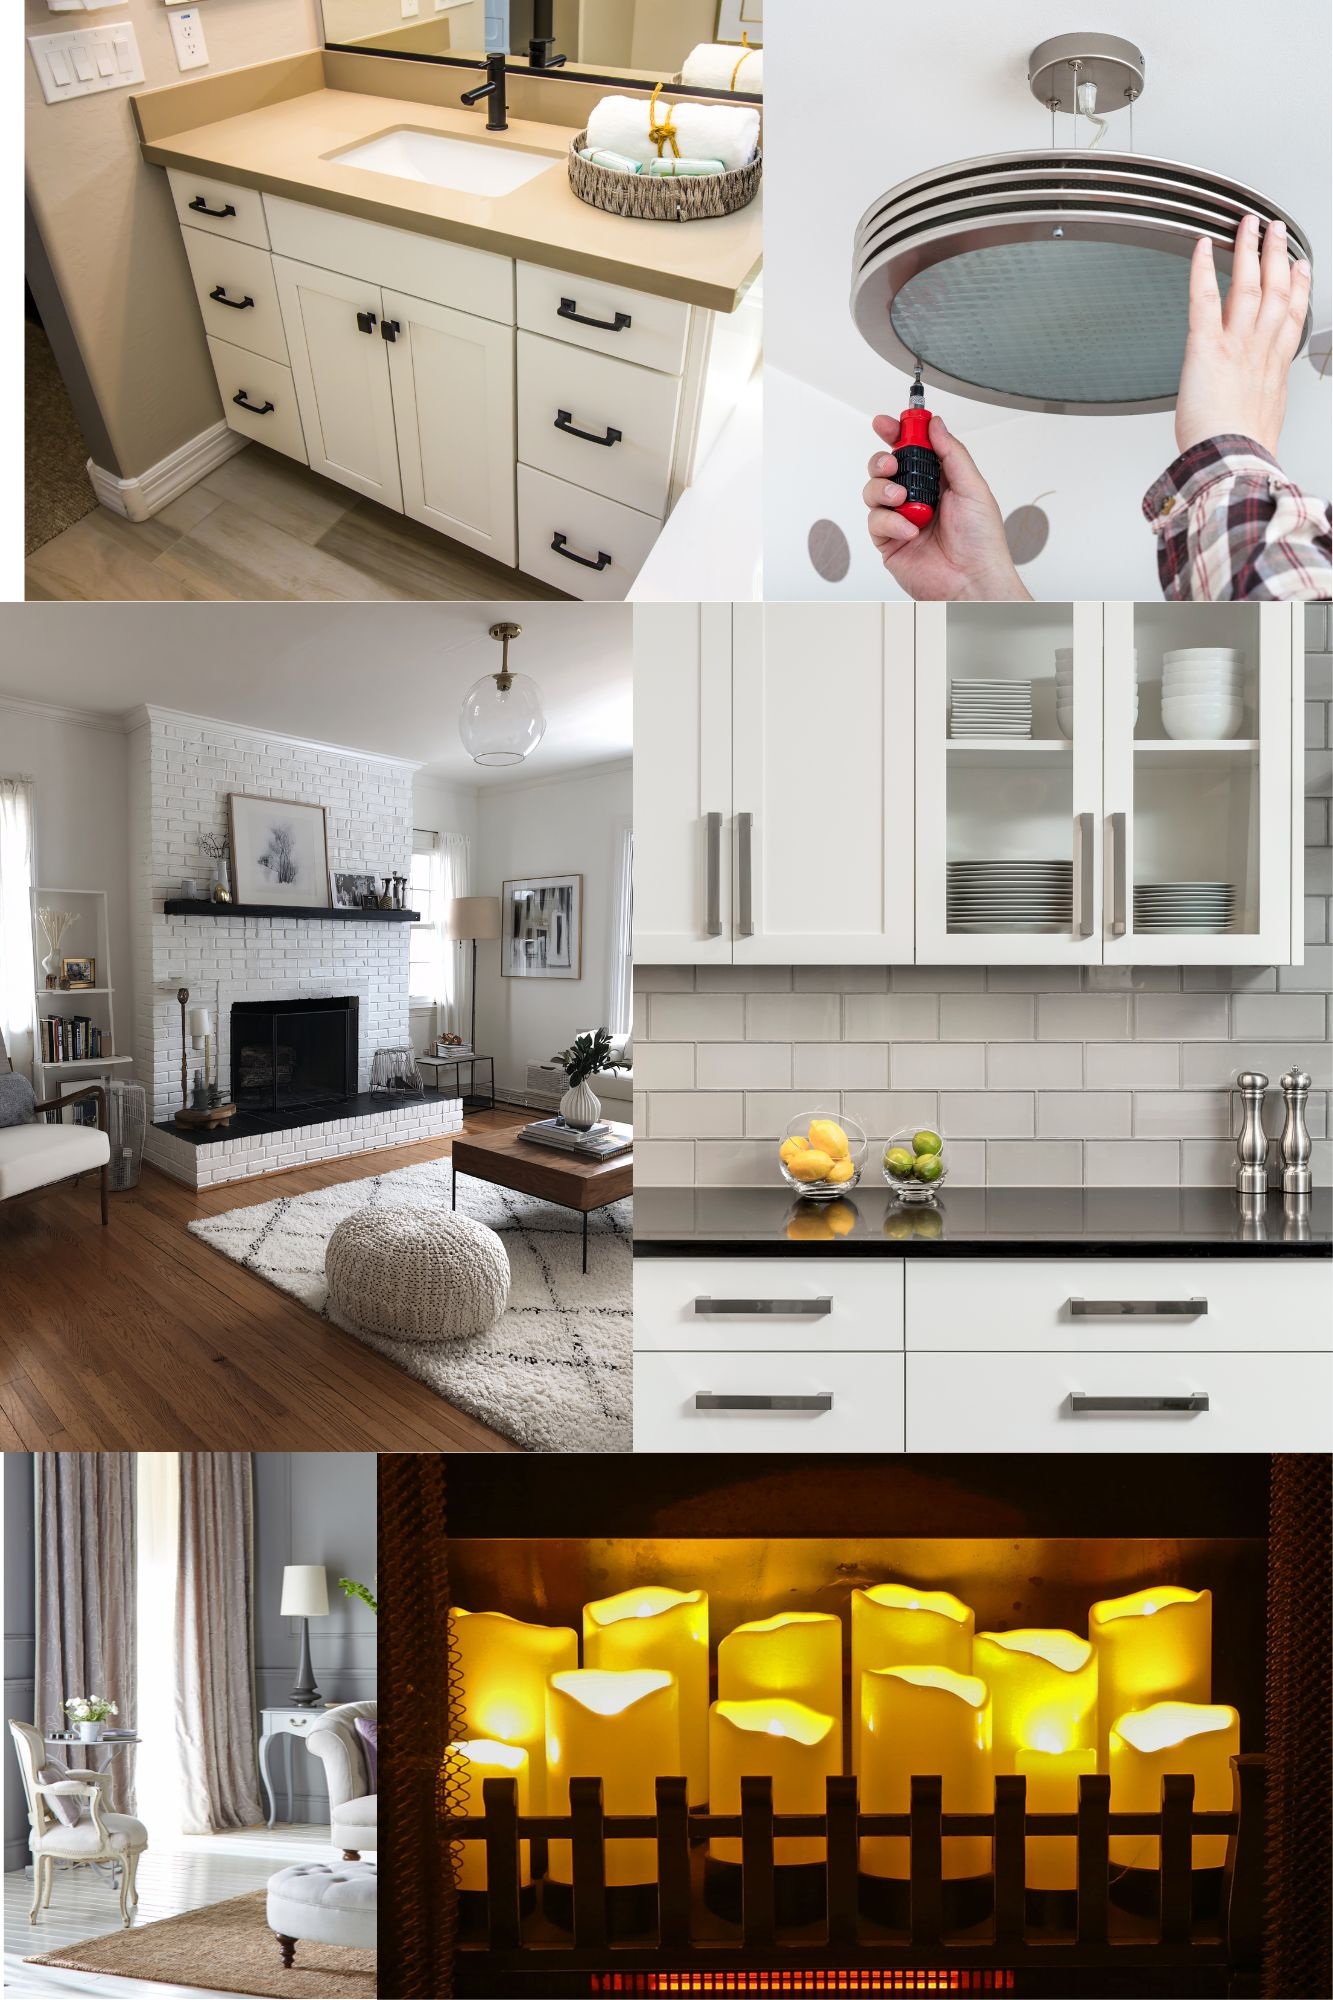
Replace your old Boob lights! Most builders, flippers, and even landlords install the standard Home Depot or Lowe’s, lower-priced lights also known as boob lights or nipple lights. I replaced all of our lights on the main floor except for 3 (2 were ceiling fans that I actually like. And the hallway light, it’s vintage and I love most things vintage) in our Colorado home.
Rehang your curtain rods to just below the ceiling. This adds height to your lower ceiling rooms. Yes, you will need longer drapes, but if you don’t love your current drapes, wait until there is a drapery sale at your favorite big box store and then go shopping for the drapes (95 inches is probably a good length for drapery just below the ceiling) of your dreams. Did you know that in Victorian times, if you had extra fabric hanging at the bottom of your curtains or draperies, it was a sign of wealth?! So let the extra drapery fabric hang down and pool on the floor! It not only will show your good design taste but your abundance and wealth!
Paint…paint will spruce up just about anything. I have painted the old, dingy, and scratched wooden vanities in my bathroom’s more than once. The most recent vanities I painted a crisp shiny off-white, and I also painted the dark wooden mirrors that hung above the vanities. Both vanities have built-in counter/sink combos that were in decent shape, so painting them, up leveled the vanities a bit. It definitely made both of my bathrooms appear lighter and airier, which is what I was going for.
Upgrading your cabinet and vanity hardware. New hardware will uplevel the look of even builder-grade cabinets. After I painted the vanities mentioned above (and I’ve done this with painted furniture too), I added new hardware. This made the vanities look like they were brand new! What a budget-friendly way to make a big change with just a little time and elbow grease.
Upgrade your old showerheads. This is a super easy switch and will make showering feel so much more luxurious. Showerheads come in all different styles and sizes. You can have a massaging showerhead. You can have a rain shower head. You can have a brass or gold-looking shower head for a super high-end look. Brass and gold fixtures are back in style!
Paint…more things to paint! Paint or whitewash your old brick fireplace and change out the mantel, depending on the style you are going for.
If you don’t use your fireplace as a traditional fireplace and you don’t have the budget to convert your wood-burning fireplace just yet (like us), you may love this idea! Clean the firebox and then fill it with different-sized battery-operated LED flameless candles (the ones you can set on a timer or use a remote work best). Then as evening approaches and the light is fading outside, your LED flameless candles will put off an amazing glow and give a great ambient light that will be perfect to relax with as you are settling down for the evening. This was one of my favorites and a super easy trick I did in our Colorado home.
Don’t compete with the countertops that you don’t love. Instead, enhance them or compliment them with a new backsplash. Subway tile is all the rage right now and creates a timeless look. There are lots of different types of tiles or self-adhesive sheets of tiles that you can choose from. I selected a porcelain tile that is in different shades of beige, from light to dark. It almost has an Ombre look. I love how it turned out and it was very affordable.
Wallpaper, but not traditional wallpaper. There are so many peel-and-stick wallpapers to choose from now. You can look online and order enough peel and stick wallpaper to cover one wall – think feature wall or to cover an entire room. Wallpaper is making a comeback and is very popular in powder baths, dining rooms, and primary bedrooms again! I used peel-and-stick wallpaper to uplevel my walk-in closet. It turned out amazing and I LOVE it!
Create a Gallery Wall! If you are like me, you have so many photos of your kids or family and you don’t know what to do with them all. I love to thrift and shop at off-the-wall shops that have unique and very pretty photo frames. I have collected quite an assortment of photo frames over the years. Instead of being matchy-matchy, I used all of the frames I’ve collected over the years and made my very own unique and eclectic Gallery wall in our family room. On top of family photos, I included some art and quotes that I also love. If you like a more streamlined look, you can go to a big box store and buy all matching frames in the different sizes you need and then plan your gallery wall using a grid. The easiest way to plan your gird is to use craft paper. Trace the frame sizes and then decide where you are going to put the frames on your wall. If you use the craft paper with scotch tape, you won’t have multiple holes if you don’t love the way you design it the first time. Another tip is to use the Command Strips that you can remove up to 3 times before they aren’t sticky any longer. I use Command Strips all of the time and love that my walls aren’t damaged or have multiple nail holes everywhere!
There you have it! Ten super easy and cost-effective ways to up level your home without having to do a complete remodel. I’d love to see your before and after photos and I will be adding photos of our new home with before and after photos of any of the projects that I do. Think Mid-Century Modern with an eclectic spin. Stay tuned for more on this exciting new project!
House Hacking, to cover your mortgage and more? What does that even mean? In this article, I’m going to explain what that means to my family and how we’ve been able to house hack our way to income that covers our mortgage+ more in our primary residence.
The Back Story
In order to explain this to you, I need to give you the back story. When I met my husband, he owned a condo in another town and he lived there full time. Once we got serious, we moved in together in the city where I lived. While we rented from other people, he became a landlord and rented his place out to a friend from his gym. That guy ended up not paying his rent and trashing the place. After the “gym trasher” moved out and my husband lost quite a bit of money, he decided that maybe he wasn’t the best landlord after all.
So to be sure this doesn’t happen again, he hired a property management company to manage the property going forward. At first, he didn’t see any additional income but eventually, the property became income positive. The rental prices in the area he owned were still low until a few years ago. Colorado’s real estate prices for rent and sale have been increasing year over year for the past several years. Eventually, he started to make a profit on this rental property that’s still not located in the best part of town.
Where we are Today
Fast forward to today and we now own that condo and another one that we bought together after we got married. Before we decided to have kids. We really did think we’d be a dual income, no kids couple. At the time, living in a two-bedroom condo with amenities seemed like a great bet for us. One thing is certain, things definitely change! Once we had our twins, our living situation suddenly seemed to not be the best bet anymore.
Condo life was great until the twins arrived and then it was extremely hard for me to get in and out of the condo due to the stairs. We had lots of stairs and they were super steep! I couldn’t carry both babies down in their car seats at the same time. I didn’t like leaving one at the bottom of the stairs while I ran back upstairs to get the other one and then come back down.
At first, this process was extremely hard and took me a good 30 minutes from the time I went out the front door to get them both secured in the back seat of my car. I got faster with time, but man it was difficult. Especially after a C-section and a 7-week hospital stay. So to make this process not so long and excruciating, we started looking for a house as soon as I was up for it (when the twins were about 6 months old) with infants in tow.
One Condition
My husband had one condition to buying a house and moving out of the condo. The new house had to be income-producing. What that means to us, is we had to have a part of the house, preferably the basement, an apartment over the garage, or an in-law suite in the back yard that we could rent out long or short term. We looked at probably close to 100 properties and even made offers on a few, but thankfully those didn’t work out in the end. Just when I was ready to throw in the towel and say forget it, exclaiming “we can just make the condo work!”, we found the perfect house!
Finding the PERFECT Property to House Hack
By perfect, I mean it had a fully finished basement with a separate entrance. Other than that, well, let’s just say…it needed some serious TLC. We closed on 10/22/19 and moved in on 11/7/19. Before we moved in, we started working on the basement to get it ready to be able to rent it out and hopefully make income with it. By we, I mean a contractor and our awesome handyman. The work seemed to be never-ending and every time we turned around the price kept going up for this and that.
I actually learned a lot through this process about how to work with contractors and handymen. I love our handyman, but the contractor that we hired nickel and dimed us a bit. I would ask him to paint a room, and he would give me a quote and I’d say ok, yes please do that. Then he wouldn’t paint the ceiling. When I asked him when he was going to paint the ceiling, he said that wasn’t included in the original price. I thought the ceiling was part of the room, but apparently, it’s separate! So lesson learned.
Be specific when asking contractors to do work. You have to ask them about every little thing to be sure your expectations are the same as what they are expecting to do for work. In the end, we are very happy with the final outcome, it just took a bit longer than we hoped and cost quite a bit more than expected.
I’ll share some before and after photos below that show the difference in what it looked like when we moved in and how it looks now. But first, let me explain the meaning of House Hacking (to us anyway)…
What is House Hacking?
According to Forbes.com, “Simply put, House Hacking is a strategy that involves renting out portions of your primary residence to generate income that is used to offset the cost of your mortgage and other expenses associated with owning a home. When done correctly, it allows people to live in expensive areas completely for free, or even generate positive income through home ownership. Not too shabby right?” Read the full article to learn more.
We are house hacking according to this definition for sure!
Our Version of House Hacking
For us, we chose to short term rent our basement. That way, we controlled the calendar and when friends or family had plans to come to visit (which we’ve had a lot of company since finishing the basement) we have space and can block the dates out so that they aren’t available for short term rentals. We still make a good income even with friends and family coming to stay often.
We are even trading a stay in our basement with some past guests in exchange for trimming our trees. The price we were quoted to have our trees trimmed by a local company was a lot more expensive than what it will cost us to host these guests for 5 or 6 nights. So it’s a win-win for all of us.
I follow Graham Stephan on YouTube. He’s a professional house hacker and has made a business and successful YouTube Channel out of house hacking. You can see his videos and subscribe to his channel here.
Make sure Short Term Rentals are Legit
Before short term renting any part of your property, do your due diligence and make sure it’s legal where you live. If you have a Home Owners Association and pay fees each month or annually, there may be limitations on renting a room or an entire part of your home for short periods of time. Be sure to check your HOA and city’s by-laws before you start our plan for a construction project to turn your residence into a house hacking opportunity.
If there are limitations on the amount of time you can rent your space out, you may be able to still rent it out but in a different way. Traveling nurses need furnished places to stay and normally have contracts for more than a month. Some business travelers need longer-term stays and prefer to stay in a furnished place that feels homier than staying in a hotel.
House Hacking Ideas other than Basements
An attic that you could add an outside staircase to make it a separate entrance.
A shipping container or other type of building in your yard or on your property.
If you live in a rural area and have acreage, you could add an airstream or other type of camper or set up a camping site to rent out through Tentrr or Hipcamp.
A garage you could turn into a separate unit.
A second master bedroom/bathroom or a room and bathroom in your home that is away from the main part of the house. Some short term renters don’t mind renting a room in a home and sharing the main spaces with others, but during the pandemic, most travelers prefer a private, separate space.
Our Punch List
Here’s a list of the things we had to do to get our basement ready for guests of any kind, paying or non-paying. We use our basement as an in-law suite when my parents, my husband’s parents, or any other friends/family come to visit. We don’t charge friends and family for staying with us. One of the main reasons we decided to short term rent our space is so we could control the calendar.
Our Punch List items:
We had mold! UGH! That news was devastating! We had 8-month-old twins who were premature and one of them came home on oxygen. I was very worried about their health. We had to mitigate the mold in the laundry room and bathroom. The contractor did a great job of covering the vents and putting up a plastic zipper-like door in the entryway to the space that was being mitigated. That eased my worries a bit. We hadn’t planned on replacing the drywall, so that added to the cost because we had to have new drywall installed, mudded, and painted in the laundry room/kitchenette, hallway and bathroom.
We installed two egress windows, one in each bedroom. See the photos below.
We replaced all of the original aluminum windows with energy-efficient windows that are pretty and help to keep the space warm.
We added trim around all of the windows & painted it white. The old windows didn’t have any trim.
Our handyman built a wall with shelving on our side of the basement (where we go in and out) and installed a door with a one-way lock. The lock is on our side, so the renters can’t come to our part of the house without a key. This keeps it truly separate. Most short term renters want separate, private spaces right now during the pandemic. He painted the wall, door, trim, and shelving white and it all turned out great. See the before and after photos below.
We took the laundry room completely apart and removed everything so we could start over with a new layout.
We installed new LVT flooring in the laundry room turned kitchenette, hallway, and bathroom.
Our handyman took the existing cabinets out, painted them, and cleaned up the countertops so we didn’t have to buy new countertops or cabinets. Then we moved them to a different wall for better use of the space.
We installed a brand new utility sink with storage to use as a “kitchenette” sink.
We installed a new 7.0 cubic ft fridge that is the perfect size for the space and short term renters.
It Cost How Much?!
All of this cost us approximately $30,000. We haven’t made that all back yet since we only started renting our space out in July due to the pandemic. We are on track to earn this money back over the next 6 to 8 months though. Once we earn the money we spent to get the space ready to rent out, we will be in the black, and then we have an idea to turn another space on our property into another income-producing space. More on that later.
Before and After Photos
For now, here are some before and after photos that I can’t wait to share with you. Read the captions about what we specifically changed.
The wide open basement with no separation to the upstairs where we live before the wall was built.
We call this our “Wall of Value“. My husband is a huge couponer and stocks up on things when they go on sale and he has a coupon. That’s a whole other blog post! This is at the bottom of the stairs on “our” side of the guest suite that we rent out. It has a lock that we keep locked when we have guests so that their unit is truly separate.
This is the wall and door that our guests see on their side of the guest unit. When the door is locked you have to have a key to unlock it and we keep the key with our other keys upstairs.
The Whimsy room before it became the Whimsy room. We installed new windows and doors in this room.
The Whimsy room with new windows, trim painted white to include an egress window for safety.
Laundry room/kitchenette and hallway storage before!
Laundry room/kitchenette and hallway storage after. Notice the flooring, the moved and painted cabinets, new sink, and new fridge. We painted the cabinets in the hallway too. The countertops cleaned up great!
As you can see from the photos. I only painted the laundry room, hallway, and bathroom. Even though I don’t love the peachy color on the other walls, it was in good shape. It wasn’t worth the time and money to repaint it until we are going to do other improvements. I really was trying to maximize the work we were having done and do it the most cost-effective way possible.
We decorated the sunroom since this is the first thing our guests see when they arrive. This is currently how they enter the property. We have plans to do extensive landscaping next summer, so when that is done, the entrance to the basement guest suite will be through the yard on a paved path. For now, they come into our decorated sunroom, see the second photo below.
Sunroom before. The old owners didn’t use this room at all.
After, the sunroom decorated. We do have plans to paint the sunroom, put in new flooring, replace four or five of the windows, replace the doors, and install an indoor/outdoor type heater so we and our guests can use this room year-round. That will be happening in stages, starting this winter.
I will be writing more about how we got ready to short term rent our basement. In future articles, I’ll cover, what we had to purchase, how we are keeping it top-rated, and occupied regularly. We plans to make a few more improvements to the basement suite. We will also be adding a few higher-end amenities to our property, so that we can rent our space out for top dollar and keep it occupied for more nights each month.
I’m not a professional interior designer or contractor by any means. I just love houses, design, and DIY projects. I dabble with designing and creating my own spaces when I have the time. If you aren’t comfortable or confident doing this on your own, you should absolutely consult with a professional or maybe a few professionals. I found a great article written by another blog, “The Fill” by Budget Dumpster. This article gives you a step by step guide if you are considering turning your basement into an apartment.
Please subscribe to get my newsletter and ensure you don’t miss an future articles with information about how we are house hacking to cover the cost of our mortgage and more expenses!
If you are house hacking in any way, I’d love to hear from you. What are you doing for your house hack? How did you come up with the idea? How are you managing it; are you managing your property yourself or did you hire a property management company? And, last but not least…What would you suggest to other house hackers to maximize their income from house hacking? Please comment below!
Other Resources that may Interest You
TV shows about short term rentals that you may like to watch. I’ve watched most of them!
On Netflix; Stay Here: Designer Genevieve Gorder and real estate expert Peter Lorimer show property owners how to turn their short-term rentals into moneymaking showstoppers.
On Netflix: Instant Hotel; Teams of Australian homeowners compete for the title of the best Instant Hotel by staying overnight in each other’s rentals and rating their experience.
On HGTV: Vacation House Rules; Real estate expert and contractor Scott McGillivray shows homeowners how to unlock their vacation property’s full rental potential. He offers tips on how to transform the most neglected and unlivable spaces into showstopping pieces of paradise.
On NBC.com: Cash Pad; Former stars of The Bachelorette and serious house flippers JoJo Fletcher and Jordan Rodgers partner with homeowners hoping to turn their properties into thriving short-term rentals. JoJo and Jordan will transform these ordinary spaces with unrealized potential into profitable vacation-rental hot spots.
On FYI.com: Vacation Rental Potential; Ever dream of buying a vacation home that generates income? In conjunction with vacation rental online marketplace HomeAway (now part of VRBO), A&E Network presents a series that illustrates how investors make money by renting homes to travelers. Each episode features host Holly Baker, a real estate professional and longtime vacation rental owner, working with buyers in popular vacation destinations to weigh price, location, and design preferences to select the property of their dreams. Viewers then have the opportunity to stay in the actual properties featured on the series.
Anyone who knows me well knows that I love having a neat and tidy home. When I was single, my home used to show pretty close to a “House Beautiful” magazine cover every day. It was easy to make it look that way when I lived alone. Well…that was before marriage and then we had kids. I provided a tip for small space living with kids to Redfin for their blog a while ago. That tip along with nine other great tips has been included as one of their top 10 tips!
Now that we have kids, most days our home shows more like a trashed toy store at the end of a busy day.
Luckily, I have been able to find solutions for the massive amounts of toys and things that come with twins. Think 2 of everything!
As a twin mom of 6-year-old boy toddlers, toys can quickly take over every room. To keep the toys at bay (twins – think two of everything) we have designated areas and pieces of furniture for toy storage. For example, in our family room, we use a hinged, soft close, tufted fabric ottoman as a toy box and coffee table. Once the day is done, the toys are stored away in the ottoman, and we simply place a cute tray on it to use as our coffee table. Perfect for drinks and the remote. – Litte Miss Idea
My love of having a tidy and neat home hasn’t changed. My expectations of how to get that neat and tidy home has. I basically let the mess and crazy be until right before dinner time. The goal is to pick everything up before dinner, bath, and bedtime. At the end of the day, after bedtime, if I can come into the family room without tripping over a mound of toys, it’s been a successful day. My goal in the evenings is to be able to sit, relax with a cup of tea or glass of wine and watch a show in my neat and tidy family room.
More DIY Projects to share this month
My love of all things DIY or decorating is something I love to do. I also love sharing the before and after of those DIY projects. If you would like to see some of my DIY projects, check out my family heirloom project that turned out better than I expected! I plan to post my primary bedroom makeover later this week and also share my ideas and low-cost things you can do to uplevel your home living space without doing a complete remodel! I’m super excited to share those ideas with you. They are things that I have already done or are in the process of doing at our home too! I’ll even share some before and after photos for you! Stay tuned!
I hope the tips for small space living with kids are helpful for you. If you have a great organization or storage tip, you’d like to share, please comment below. I love hearing tips from other parents on how they manage the mountains of toys and other stuff that come along with kids these days!
Here’s another great project completed during naptime!
Family Heirloom Hutch Before
I love to re-use, re-purpose, and re-do furniture! I’ve never painted a piece with Chalk paint before. I wanted to, but I thought it would take a lot of time that I just don’t have right now. You can imagine my surprise and overall feeling of complete gratification when my friend, Donna, recently visited and offered to not only help me but show me how to do it! Check out my family heirloom updated with Chalk paint!
The piece of furniture we chalk painted is a family heirloom. I don’t know exactly how many years, but I’m thinking at least 40 or 50. My grandfather actually made this piece of furniture at the furniture company he worked at. It has a table and four chairs to match, but that particular piece was lost about 20 years ago in one of my many moves. Remember, I’m a Navy Brat, so I used to move a lot. And…when I say a lot, I mean a lot. I lived in 17 places over a ten year period in my 20’s. I have finally settled down and am loving it! Excuse my off-track moment, but I wanted you to understand the true meaning behind the word move for me. I always keep the hutch with every move because it provides storage, no matter the size of my living space.
The furniture company my Grandfather worked at was, Fancher Furniture Co., Inc. Fancher Furniture was created in 1911 and operated until 1997 with the company being formally dissolved in 2003. Unfortunately, Fancher Furniture never really thrived, but they did offer my Grandfather a job that he loved and walked to for many years. I think my grandfather would be impressed with how my family heirloom hutch updated with Chalk paint turned out!
The Hutch that my Grandfather made before I updated it with Chalk paint!Bottom of hutch before!Before top of hutch
Products we used on my Family Heirloom Hutch update
I usually have a couple of ACE coupons on hand. You know the “Ace is the Place” Hardware store. Call to make sure they have what you need before you head out. With the pandemic, lots of people are updating their homes inside and out. You could go to a hardware store only to be disappointed that they are out of stock of what you went for. So…before we got started, I called to check. They had what we needed in stock. We headed there straight away to buy a small can of chalk paint. I already had sandpaper and the wax we needed. I also wanted to get a couple of new drawer pulls, so I took the old drawer pulls off and measured (before leaving for Ace) so that I could get the right size of pulls while we were there.
Things we had to buy:
A 30 oz can of Rust-Oleum chalked paint in Serenity Blue
Two new drawer pulls cost about $3.00 each. I already had nice knobs for the doors, so I just re-used those.
Things I had on hand:
Three different sized paint brushes
A couple of pieces of cheesecloth
A Shamy
A can of clear chalk paint wax – I bought this a year or so ago and it was still good, so we used it.
How much did it cost?
The cost for this entire project was only about $33 with tax. I did already have some of the stuff we needed to use at home though. If you don’t have everything needed to complete the project, you may have to spend a little bit more.
It took us two separate nap times to finish the project with drying time, waxing time and decorating time. So in total time spent, it probably took us a total of about 3.5 hours from prep to completion. It was super fun to do this with my dear friend. We talked and laughed while we both worked on the piece. She showed me how much fun this can be. Now I want to paint at least three more pieces of furniture in my house. I’m thinking of how I can maybe find free furniture to paint and then try to sell or give away down the road. My friend may have created a chalk painting monster! Ha!
It really was easy to update my family heirloom hutch!
I’ve talked about how easy it was, so let me tell you the step by step easy way we did this. If you want to run out to your local Ace Hardware store this weekend to buy what you need, you’ll know what to pick up ! ?
After full hutch with the new drawer pulls and knobs for the doors that I already had on hand.
Step by Step how to update your family heirloom piece
First, we took everything out and off of the cabinet. Then we moved it (it’s two pieces, so moving it was easier than it looks) to the sunroom. We put both pieces on a clear plastic shower curtain that I had in the garage. I’m not sure why I had that clear plastic shower curtain in a tool drawer in my garage, but I’m sure glad I did!
Once the piece was separated and there was enough room between the now two pieces, we used a clean damp Shamy and cleaned the piece really well. I even took some Q-tips and cleaned in between the dental detail on the front of the cabinet. I was sure to get all of the dust off. I knew it wouldn’t look good if we just painted over the dust!
When it was completely clean, we each started painting. You really can’t mess it up. You just paint with even strokes and try not to paint too thickly. If you don’t apply enough the first time, you can just go over it again when it’s dry. Chalk paint dry’s pretty fast, especially here in Colorado where the climate is really dry.
We kept our strokes light and airy
We wanted the final result to be a little distressed looking. We ended up only doing one coat of paint on the entire piece except for the back of the top piece that the shelves are in front of. That part of the piece is more like paneling, so it is coarser than the wood of the cabinet. I ended up needing to put another coat on the paneling part and then when it was dry, sanding a little off in the grooves.
When the piece was completely dry, we went around and roughed it up a bit. By “roughed it up” I mean we sanded some of the edges and around the detail areas. It shows the wood through and I love the look. Then we cleaned the dust from sanding with another clean damp Shamy.
Wax goes a long way
After the piece was completely dry and clean, we used the clean cheesecloth to apply an even coat of the finishing wax to the top and the shelves. We didn’t wax the entire piece, just the parts that I would be dusting or wiping down often. The wax gives it a shine and smoother finish. A little bit of wax goes a long way too!
Finally, we installed the new drawer pulls and the old doorknobs again. We moved it back inside. Loaded it back up with the stuff that was inside before we started but organized the contents a bit more and then decorated the shelves.
I re-did this on a 1950’s China hutch, but you can use the steps above to basically Chalk paint any piece of wood furniture that you have on hand or may pick up miraculously after reading this.
After decorated hutch. I LOVE it!
Don’t just take my word for it
If you are more visual and like to see how something is done rather than reading about it, check out this great video I found from DIY Deanna on YouTube. Deanna shows how easy it is to Chalk Paint furniture on her channel. It really is soooo easy!
https://www.youtube.com/embed/gh9m8yDLV0Y
The feelings around the final outcome of my family heirloom hutch update project!
I have such feelings of satisfaction, pride, and love around this project. I love how it turned out. I love that my friend was excited and on board to help me with this project during her visit. I love the quality time we got to spend together doing this project. I love that we both really enjoyed doing this together. I love that we now have one more thing in common to talk about when we visit or just have a phone catch up! I love that we were able to update a piece that has been in my family for years and now will continue to live on for years and years to come. I feel that my grandfather would be very proud of me and love the way I updated my family heirloom. I’m sure he’s smiling down on me for this one!
What would you like to chalk paint in your house? Leave me a note in the comments or better yet…take a before and after photo of the piece, you update with chalk paint. I’d love to see your before and after projects!
Here’s another great project I did during naptime!
Gardening has become my jam! My 2.5-year-old twins love to help me dig in the dirt and then put the plants we are going to grow into the garden box. This is something fun we’ve done together this summer that has made me so happy. We planted the garden together, now we water it together and soon we will harvest it together. A blogger friend of mine, Arezou, founder at Call Emmy considers gardening and planting seeds as fun activities for kids. She even says it is one of the best screen-free activities for kids in her recent blog. To learn more about other activities, check out her blog.
I started my real-life, planted in the ground garden during the lock-down time in 2020! Why the exclamation point?! Planting a garden isn’t that big of a deal, right?! Well…for me, it’s a HUGE deal. I love to get my hands dirty and plant things. I haven’t had space to actually plant flowers let alone a real live garden for many, many years. The exclamation point is because I’m so freakin’ excited about growing my own vegetables that our family can eat and we can share with others. Because I now have a garden and herb patch, so to speak, I needed garden markers so I know what vegetables and herbs I planted while they are germinating and growing. In this post, I show you how I easily made these garden markers using stuff I already had at home for zero dollars. You probably have the supplies needed to make these in your home too!
When we moved into our new house, the previous owner had this very scary-looking shade cover sail that was anchored by two metal beans that went up and over towards the house. The previous owner was a welder, so he welded this shade structure himself. When we were about to close on the house and still negotiating a few things, we asked him to remove the metal posts (they were at least 12 feet into the air and swayed in the wind big time) before we moved in. We didn’t think to ask him to remove the metal boxes that they were anchored in. I honestly thought we would be able to move them to a different part of the yard and use them as great garden and flower boxes. Little did I know until I recently cleaned them out that they are filled with heavy steel. That’s what kept the other part that he removed from crashing into the house. My mistake!
Original metal planter boxes that were attached to the house with heavy metal beam posts and shade sails. Super scary when the wind blew!This is the garden I planted last year in one of the heavy metal boxes.
It turns out that they are way too heavy for us to move them ourselves and we don’t have the money to pay someone to move them for us or to rent a piece of heavy equipment to try to move them ourselves. Plus, honestly, I’d never trust myself or my husband to take on a project like that. I know we would either get hurt or crash something into our house. We aren’t skilled in this type of work, so I decided to make them work to the best of my ability right where they are.
Getting the garden beds ready has taken me some time. I spent most of the day last weekend, cleaning out both garden boxes and refilling them with garden soil. I turned one of the boxes into a flower bed and transplanted all of the flowers (they were spread between both boxes) into one and added a few more that I love. Zinnia’s and Marigold’s are two of my favorites because of the bright colors. An added benefit of planting Marigolds, supposedly squirrels and rabbits don’t like the way they smell so they won’t eat your other flowers. I sure hope this is true because I spent a lot of time planting really pretty flowers that I want to enjoy all summer long.
In the second garden box, I just cleaned it all out and refilled it with garden soil. A good friend of mine is gifting me some vegetables and herbs that she got started but ended up with too many once the seeds germinated. Thank you, Michelle! I’m planting the gifted and I bought vegetables and some herbs this weekend. I already planted some herbs in my pallet herb planter shown below. My good friend, Sarah, made this for me a few years ago and I still love it as much today as I did when she first made it for me. I have more herbs to plant than I had room in the pallet herb planter so I will add them to the garden this weekend. I love saying the word garden! ?
Since originally writing this article, we have, in fact, got rid of two of the heavy metal boxes. A nice couple really wanted them, so they came over and hauled them away. I hope they get lots of use and enjoyment out of them. I’m happy to have my yard back and not worry about my twins getting hurt by falling onto them or running into them.
We only kept one box and with the help of friends (mostly strong guy friends) we moved one of the metal boxes to the back corner of our back yard. That is now where I have my flourishing garden. This year we (with the help of my toddler twins) planted Tomatoes ?, Zucchini, Squash, Bell Peppers, Peas, Carrots ?? and beets. Think of the yummy salads I will be making soon!
Our Garden in Full Flourish this year!
One of my twins LOVES to garden and get dirty!
Pallet Herb Garden Planter
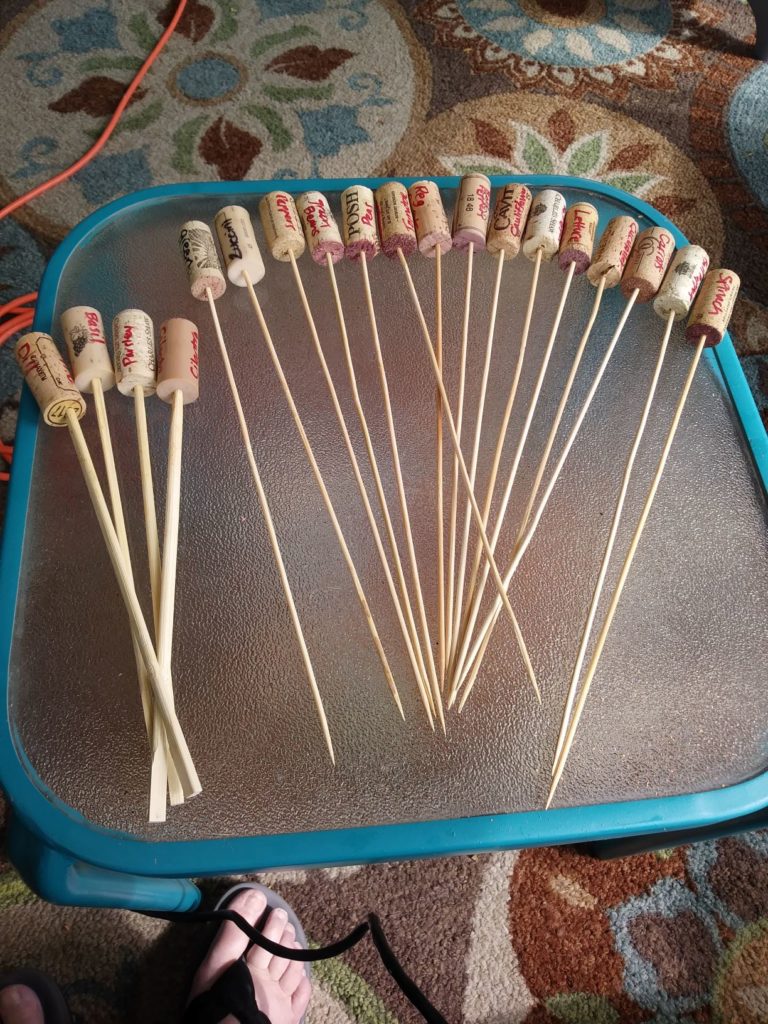
I got so excited about having space to actually plant herbs and vegetables, that I got off track for a minute. I am excited to show you how I made these really cute garden and herb markers out of things I already had at home. I didn’t buy anything for this project. I spent 0$ on the actual project (not including any gardening soil, herbs, or vegetables purchased for the actual garden) and that makes my husband very happy. He doesn’t like my DIY projects when they end up costing money. If I can do them for free, using things we already have on hand, he’s a very happy man! I did this project during nap time and it took me all of about 40 min’s to make 16 garden markers and 4 herb markers. They were super easy and fun to make!
Finished garden stakes
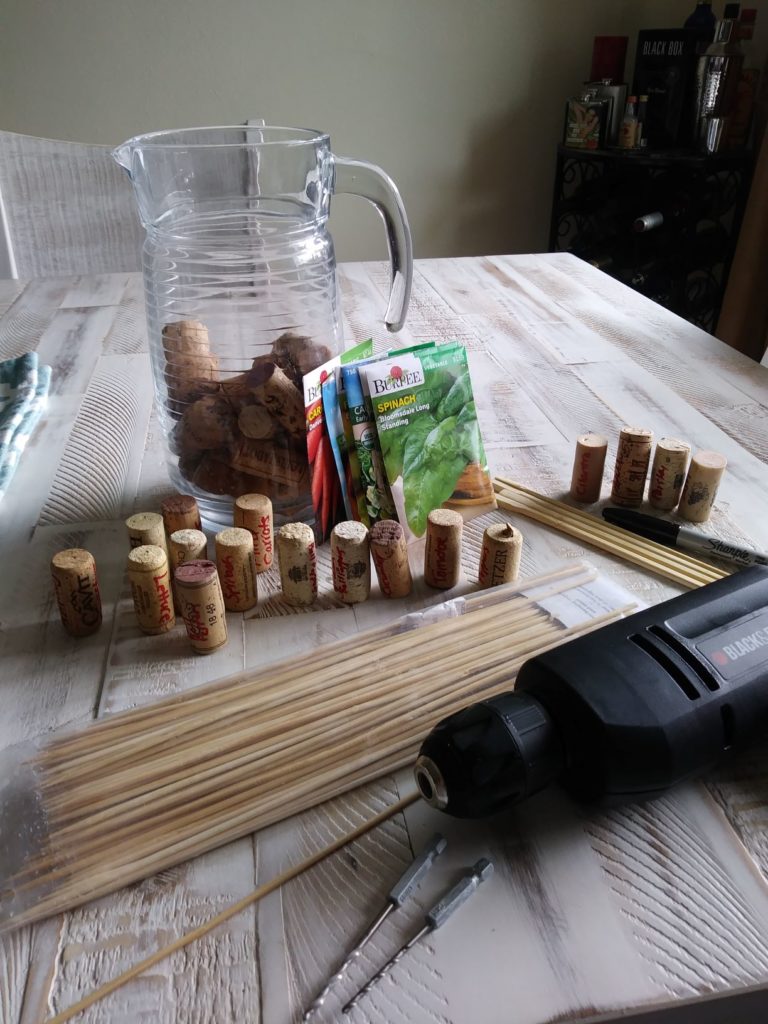
I got my drill out for this project. I love when I get to use power tools for a project. Here’s a photo of what I used and a list of the things I had on hand to make these:
Supplies I used for this project
List of items that I already had on hand and used for this project:
Wine corks – I save these and have been wanting to use them for a project, so I’m super excited that they went to good use for this one!
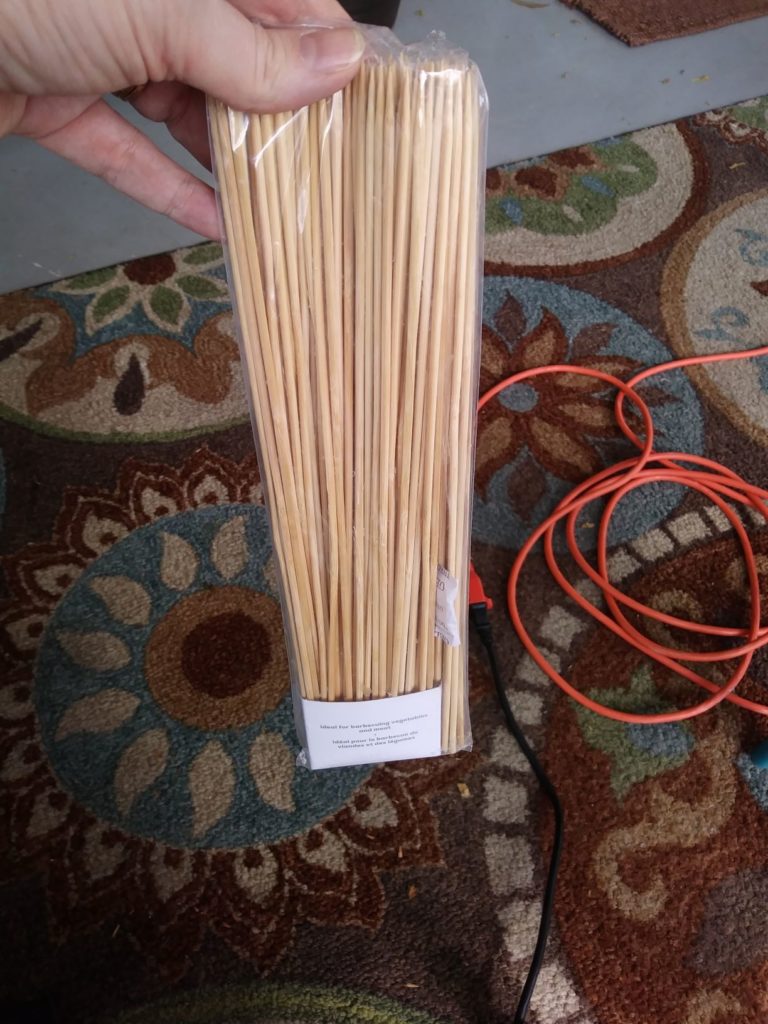
BBQ Skewers – we had these in our drawer leftover from a dinner I made last summer.
A Sharpie Pen – I used a red one for most of them but then did a couple in black to see the difference. I think I like red the best.
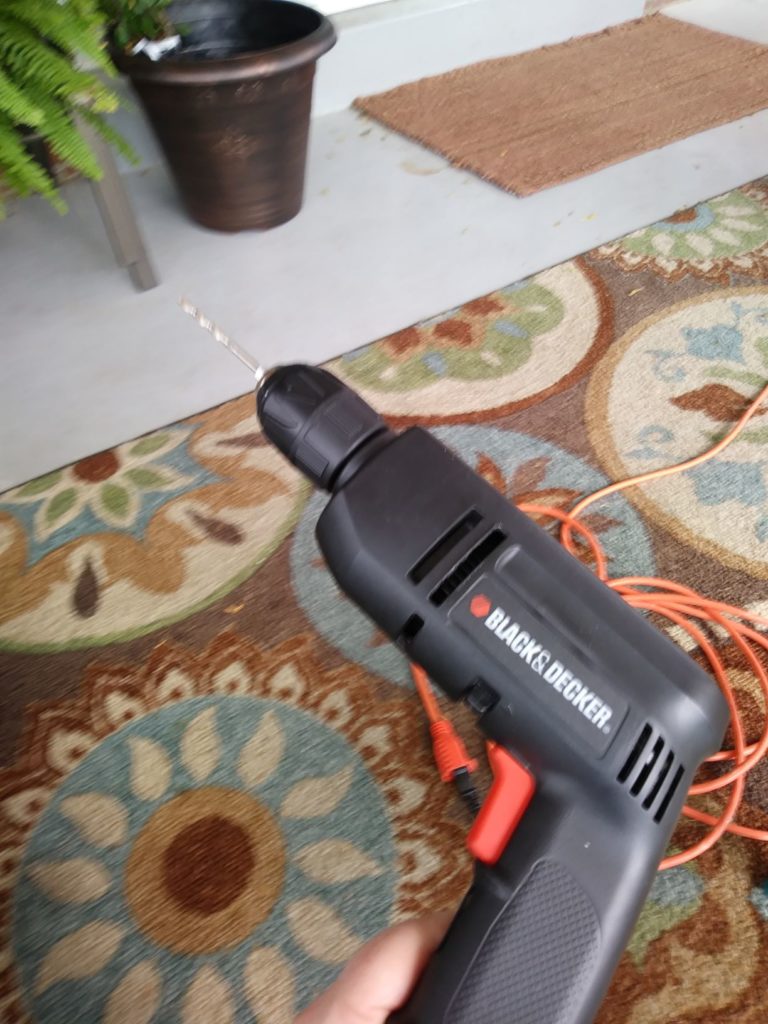
My handy dandy drill – I love it when I get to use power tools even for just a few minutes!
Supplies I used to create the garden markers
How I made them & what I used:
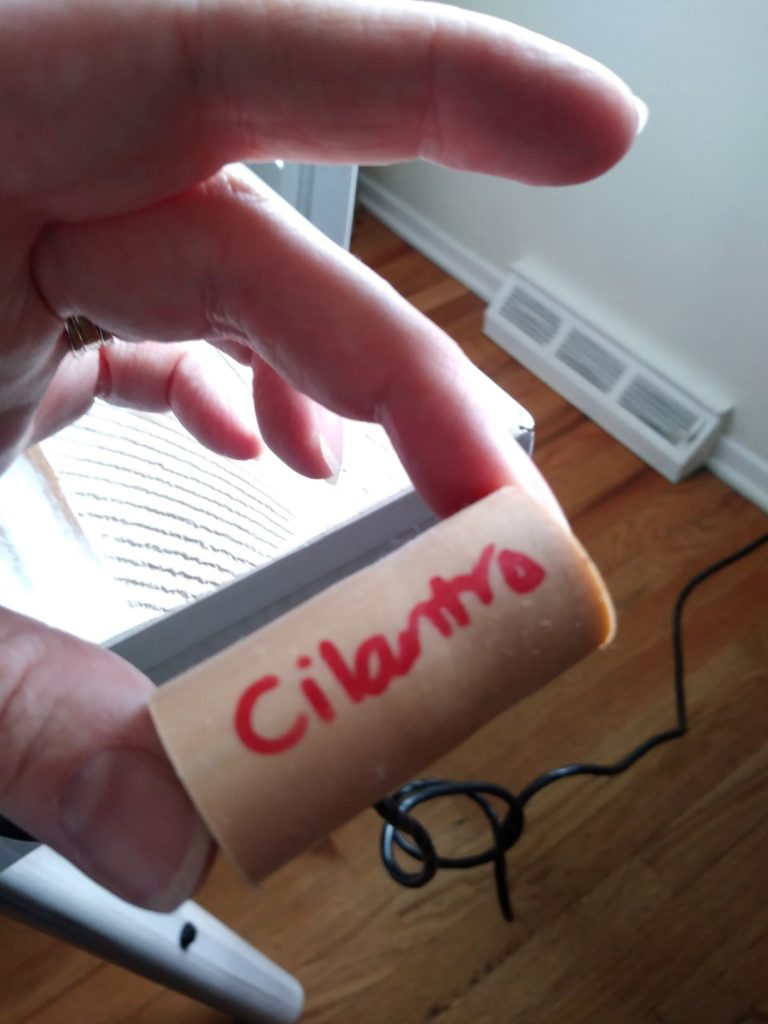
First, write the herb name or vegetable on the corks
Second, use the second smallest bit I have and drilled a hole into the end of the cord that had wine color on it or where the wine opener left its mark. I drilled about halfway through the cork to make sure the cork will stay on the skewer.
Thirdly, insert the skewer into the hole I just drilled into the cork and I repeated this 15 times!
I used the BBQ skewers for the garden markers and I used leftover unused chopsticks (from a recent Chinese food take-out order) for the herb markers. I didn’t think I needed the herb markers to be as tall as the garden markers. Once I get everything planted, I’ll see if this is true.
I love how these turned out so much that I’m going to make some as gifts for some friends. I’d love to see what you are working on outside, in your garden, or just in an hour or two when you have time to tackle a new project. If you make your own garden markers that resemble the ones I made above, please share a photo or note in the comment section below. I love to hear from my readers and connect!
Create a beautiful but simple gallery wall with things you love!
I love beautiful things! I have an eye for vintage decor or things that may not be truly vintage but look vintage. I like to mix new with old and my style is probably more eclectic than any other type of decorating style. I’m OK with that because I love lots of different things. When I wanted to create a beautiful gallery wall in our family room, I didn’t want to spend a ton of money or a ton of time creating a wall we will love for years to come. I also wanted it to evolve with us as our family ebbs and flows over the years.
I have a ton of photos that I have been wanting to frame and display on a Gallery wall. We didn’t have a free wall to display them on in our condo. So you can imagine my excitement when we moved into a much bigger house with lots of walls to fill up with beautiful art and family photos.
I have been collecting different photo frames in the colors I love in all different sizes for some time now. Before we moved into our house, I had gone thrift and discount shopping at various thrift stores and big box stores around town and found some frames I liked either already low priced or on sale. Some are vintage-inspired and some are just in the colors I like; teal blue, gray, distressed white, and gold. I already had a few things that I wanted to use, so I added new to the old and made it beautiful.
With the stuff I had on hand, I got to work using Command Strips and a couple of nails to get my Gallery Wall pulled together. Using Command Strips helps not put a ton of holes in your walls. My husband doesn’t like when I fill the walls up with nail holes. I actually put this wall together before we even had a couch. I guessed on how high to put the first row or layer of the Gallery Wall. I would recommend that you measure and not guess. I got lucky that it worked out. By using Command Strips, I was able to put things up and move them around a couple of times before deciding if I wanted it to stay where I had originally placed it. I moved things around a couple of times before I got it to look the way I really like it.
You can do your Gallery Wall any way you’d like, but I used things I had on hand and also hung up the new to me different size frames that I filled with my favorite photos. I plan to change the photo’s out as the twins get older and we have more milestone moments in our family’s life. I love inspirational quotes too so I have some great quotes interpersed on our Gallery Wall in addition to the photos.
I plan to add more photos around what I’ve already placed on the wall and will be on the lookout for some old windows (I will use them as frames) to add to the wall along with other great frames as I find more. For now, I like the way the Gallery wall looks, but I do plan to add more to it and am excited to see how it evolves.
The Gallery Wall as it evolves!
As you can see, I’ve used a couple of vintage-inspired things (check out the cute little mirror on the right that I found at a thrift store for $10!) along with framed quotes and the eclectic frames I found before we moved into this house. I do plan to add more photos of different sizes on the top and around the sides. I’m hoping to find some vintage windows to clean up, paint and turn into frames to sue like the one in the middle.
Since I only have time to work on projects like this during nap time, this project had to be completed in 2 hours or less. I was able to get this one done from putting the photos into the frames and then deciding how I wanted to space and place the different frames in about an hour and a half. I have tweaked it a little here and there after I originally got it all put in place. The tweaks probably took me about 10 minutes and I’ve done that twice. So total, I’ve spent less than 2 hours on this project. As I add things to it, I don’t plan on spending a ton of time on it. I will keep an eye out for the perfect pieces to complement what is already there so I won’t have to do a complete do over.
If you decide to create your own Gallery wall, remember use what you already have and love. You don’t have to spend a ton of money or time on it. You can be creative and it can as eclectic as you’d like it to be. Also, my Gallery wall has photographs of my family, but you’re gallery wall can be anything you love. If you love vintage movie posters, you can make a Gallery Wall out of those. If you love photographs of flowers, use those. If you have a ton of old photos of your ancestors and have been wanting to incorporate those in with your family photos, that would look amazing in old frames next to your kid’s school photos. However you decide to create your own personal Gallery Wall, I know it will be perfect for you and your family.
Share your photos of any of your own nap time projects in the Comments, but especially of your Gallery Wall!
In my first Nap time DIY Series I showed you how I was able to simply and easily transform our fireplace mantel with some paint that we already had. This week, I’m showing you how I turned an unused corner in my living room into an amazing mini office for myself. I LOVE it! I have the separation I need to get some work done, but I still feel like I’m part of the family when I’m in the corner working.
Now that my husband is working from home full time, due to the Coronavirus pandemic, I needed to find a space where I can do my work. He has taken over what was supposed to be our shared office in our “new to us” home that we purchased and moved into this past fall. I don’t work at a desk all day as my husband does, but I do need a comfortable space to be able to get some work done for an hour or two each day. Some days, it’s writing blog posts, creating images to use on my social media sites, and other day’s it’s writing cards or paying bills. It doesn’t really matter what I need to do, I just need a space to call my own and to be able to work on whatever I need to work on. I have successfully created that in this amazing mini office, in the corner of my living room.
Unused corner of living room “Before”!
Finished mini office in living room “After”!
I found this cute little, one drawer light blue wicker desk with a beautiful wood top and gorgeous crystal pull on the drawer, at an Antique shop in Wheat ridge, Colorado. The shop is more of an Antique Mall, with many vendors in the same building selling unique items. I love it when I come across stores like this and find unique things that will be new to me and I will love.
To get the desk ready to use, all I had to do was polish the top of the desk. It was almost perfect when I brought it home, but I felt like I needed to shine it up a bit. To do that, I use, Feed n Wax Wood polish by Better Bee to clean and polish all of my wood surfaces. I LOVE this product. It cleans the surfaces and then when you use a soft cloth to go back over it to get any excess oil off of the wood, it leaves a beautiful shine on the wood. Amazingly, this also helps keep the dust down. Colorado is very dry and we tend to have a ton of dust, so it shines it up and helps you to have to not have to dust as often. Win-win!
I didn’t have to do too much work to get the corner ready since it was pretty much empty all ready. I did take down the wine themed framed art from the wall and moved it to our basement, where it fit in more in our game area. My Mother-in-Law found the Mason Jar themed art work while she was out shopping (before the stay at home orders went into effect) and gave that to me as a gift. I love it in the new corner mini office and it goes with the rest of my furniture and art work in the living room. I did recover the chair so that it matched better. The chair was really pretty but the fabric that was on the seat just didn’t work for the look I was going for.
Recovering the chair took a few tools and a little bit of time, but over all, it wasn’t that hard to do. I did need another set of hands to help me pull tight as I was stapling the fabric into place on the back side of the seat. Especially when it was time to maneuver and staple the corners. Corners can be tough. I find the best way to do them so they don’t bunch is to fold the corner almost like you are wrapping a present and then staple, pull tight, staple again and repeat until you get it the way you want it to look. You want to try to have smooth, tight corners. If you can’t get them perfectly the way you’d like them, don’t stress, most likely no-one but you will even notice if it’s not perfect.
Here’s a list of the materials I used and you will need to recover a cushion on a chair:
You will need a chair that has a cushion that needs to be recovered. Duh! Thanks, Captain Obvious! Ha! 🙂
Safety goggles or eye protection.
The fabric you plan to use to cover the cushion. I usually get a little bit more than I probably need to cover it just to be safe. If you measure the seat (width and length) the fabric store should be able to help you figure out exactly how much fabric you will need. Upholstery fabric is a bit more expensive than other regular sewing fabric, so you don’t want to have to buy more than you really need.
An Iron and Ironing board, to iron the fabric before you start to cover the seat and staple it in place.
A staple gun with at least 1/2 ” staples. In the video I share below, she uses a pneumatic staple gun, but I use a traditional staple gun. Your choice!
A piece of foam cut a little bit smaller than the seat to add a little extra softness to your cushion. If it’s an older chair the foam or batting in the cushion has most likely worn down. Getting a new piece and cutting it to size or asking at your craft/fabric store for them to cut it for you, will make it much easier when you are ready to start your project. The foam goes on top of the seat, under the new fabric you are going to staple on to the seat.
A round screwdriver to unscrew the seat cushion from the chair and then re-screw the cushion back on after you have created your new upholstered masterpiece! You will need a flathead screwdriver to remove the old staples from the seat, to remove the old fabric before you get started with your new fabric.
A pair of fabric cutting scissors. A pair of sewing scissors work best. You will need these to trim your fabric when you start stapling and will most likely need them for the corners so you don’t get too much fabric built up.
A sense of humor! You probably aren’t going to do it perfectly the first time and that’s OK! Just know that this, as with anything, will just get better with practice. Or you can watch a “how-to” video, like the one below from Homes.com, so that you are more confident as you embark on this project. The video is short and easy to follow along. I use “how-to” videos all of the time to help me navigate my projects.
Supplies needed for project
Cushion cut a bit smaller than the size of the seat
Seat “Before”
Seat “After”
Seat cushion “Before” and “After”
Chair with recovered seat cushion, “After”. I LOVE it!
Desk without laptop on it, it’s so pretty!
I LOVE the crystal pull. So pretty!
Up close view of the desk with the chair behind it.
Desk and chair “Afters”
As you can see, I really had fun creating this new workspace for myself. I also love that when I’m not using it, it’s very pretty and goes well with the rest of my decor in my living and dining rooms. My friends have told me, “It’s very Meg looking!”. That always makes me smile. I obviously have a style that is unique to me, so much so, that my friends notice things that they think I would like to have in my house when they are out and about and often send me photos or tell me about them later. This has helped me decorate all of my homes in an affordable and eco-friendly way.
Next week, I’ll be sharing how I used photo frames that I already had, along with a couple of other pieces of art that I just love to create a really special “Gallery Wall” in our family room. It was so easy and took me less than an hour to hang everything up, even with a few moves & modifications (thank you command strips!). I have been putting this project off because I thought creating a “Gallery Wall” would take a ton of time. I envisioned having to cut out craft paper the size of the frames and taping that paper all over the fall to get the spacing and sizes of the frames right. Nope! It was so much easier than that and I can’t wait to tell and show you how easy it truly was. So tune in again next Thursday for this one. After that, I will be talking about some post-pregnancy medical things that have come up for me recently. I’m sure other mid-life moms will be able to relate that post.
What home projects are you currently working on or completed? I’d love to hear about them, even if they didn’t turn out as perfect as you’d like. I especially want to hear about any home projects that you are really proud of and were able to do in a timely manner, like my nap time DIY projects. Please leave a comment below and post photos if you have any. Photos don’t lie and will show off your beautiful project in a way words sometimes simply can’t convey in the same way.
Time is something I don’t have much of these days, so Nap time is when I get any of my projects done!
With one year old twins, my time for any kind of projects, especially, DIY decorating or updating my house projects are limited and honestly, had been put on the back burner. Now with our “stay at home orders”, I have more time to work on DIY projects, which has been a bit of a blessing for me. I love decorating and recreating things I find at thrift and antique stores.
Our twins currently take a long nap in the morning and a shorter nap in the afternoon. Keeping them on a great schedule and having my in-laws here has given me the time I need to get things done. I use this time to take care of myself, eat, connect with friends and family and clean up my house most days. See my article about five things I do every day to be and stay happy. Here and there, instead of doing my “normal” routine, I take advantage of nap time to tackle a random DIY project. This series will talk about and show you the DIY home decorating projects I’ve been able to tackle and complete during nap time.
For my Nap Time DIY Projects I try to stick to things that I can realistically get done in an hour and a half to two hours max. Otherwise, I have to wait until my husband isn’t working (he’s working from home now, but he’s working, so he can’t exactly help me during business hours) and can either go for a long walk with the twins or play with them so I can get my projects done. For the shorter projects I like to get them done in one day. I get so much satisfaction from completing something and having it turn out better than expected in just a couple of hours.
My first Nap time DIY Project in our new house was to paint our fireplace mantel in our family room. It was a really dark grey and with the dark brick on the fireplace, it made the whole room feel very dark and out dated. I eventually want to re-do the entire fireplace and replace the brick with a tile and take out the very large, over sized hearth, but for now, just updating and brightening the fireplace mantel is a great start!
I didn’t want to spend a bunch of time or money on this project. We are planning to completely re-do the fireplace and convert it from wood burning to a gas insert, at some point, so spending a bunch of money and time on it is out of the question for now. We also, just renovated our basement and painted all of our new doors (in the entire house), so I had some nice white paint left over that I could re-use. I used what we had in our storage area already and since it’s so dry here in Colorado, I was able to brush the first coat on the mantel and step away to work on another small project. I let it dry while I put one coat of paint on the half wall in my living room to also freshen that up a bit. Thankfully, the half wall only needed one coat & dried super fast. The half wall was a project we were going to have our handy man do the next time we have him come out (we have other outside projects that we need his help with still) but I saved money and time by doing it myself. Bonus!
The family room & fireplace mantel before
You can see in the before photo that the room isn’t that large and the fireplace is the focal point. The furniture and art work in the above photo is the previous owners. I didn’t get a good “before” photo of the room before I got started on this project so I’m using the one that was used for the real estate photos when the house was on the market (when we purchased it). I think the “before” photo compared to my “after” photos shows how I turned this room that didn’t have much personality into a family room that is cozy, comfortable and full of love now!
Family room mantel after decorated for St. Patty’s Day
Full view of family room
By using paint we already had, I was able to save money and time. I did this entire project in about 3 hours total. I started it during nap time on one day and was able to decorate the mantel during nap time the next day. Plus I had time to freshen up the half wall in our living room. It’s just a wood cap that is painted white on the half wall that goes around the stairs to our basement. It’s not that exciting to look at and I didn’t get a before photos, so I’m not including a photo of that. It’s just to let you know that I had time for more than just this one project on the day I got stated. The steps I took for this project are below:
I took everything off of the mantel
I cleaned the mantel really well. The climate is really dry in Colorado, so dust can be a problem here
I used a gallon of white paint that we already had in our storage room left over and a new paint brush that I had purchased a while back but never used
It took two coats of paint and a very little amount of touch up when it was completely dry to finish this project
While the first coat on the mantel was drying I painted one quick coat on the half wall in my living room. When I was done with that, the mantel was dry enough for a second coat. I finished the second coat and had time to do a few touch ups here and there, then wash the paint brush before the twins woke up from their nap.
The next day, when I knew for sure the mantel was completely dry, I decorated it for St. Patrick’s day. I decorate my mantel for each season/holiday. Right now it has a couple of Easter bunnies on it with some of our normal decor. I don’t have much Easter decor so it’s not photo worthy, in my opinion. I hope to be able to get some more Easter decor on sale once we are no longer on “stay at home” orders. That way, next year I’ll have a plethora of bunnies to display for Easter!
I love to decorate and do all kinds of DIY projects. Since having the twins, they take up the majority of my time, so, my projects until we were put on “stay at home orders” were on the back burner. Now that I have some extra time, my husband is working from home and my in-laws are here, I’ve had more time to get some of those back burner projects done. My in-laws help me either with the twins or my projects. My father-in law is great. I just have to tell him what to do or where to hold something and then I can get it done. I love that they don’t mind helping out while they are here. Our new house is coming together beautifully and becoming our home that our twins will love to grow up in.
What DIY projects are you working on while your kiddo’s nap or are doing their online studies? Are you finding extra time to do some of your “on the back burner” projects during this crazy “stay at home” time we’re all in? I’d love to hear about your projects and even see some before and after photos. I reply to all (legitimate) comments and really do love hearing from my readers. I hope you and your family are using this extra time to bond, eat home cooked meals and come up with fun, creative things to do as a family together. We are making the most of it for sure.
The next Nap time DIY projects I’ll be writing about are how I created my own version of a Gallery Wall in our family room and how I created a much needed mini office for myself in our living room. Stay tuned…
If you aren’t on my mailing list, please subscribe. I’m starting a newsletter that I will send out weekly, as I publish new articles. If you are on my list, you won’t miss any of my upcoming published posts. Until next time, please take care and stay healthy!
Fall is in the air in Colorado! I love Fall. It’s my favorite season. The days are cooler, the air is brisker and the leaves start to turn a beautiful gold & red color. The Aspen trees are the most colorful in Colorado. You normally have to drive up to the foothills to be able to see the change in season, but it’s a great time to go leaf peeping!
I love decorating for all of the seasons, but Fall is, by far, my most favorite season. It’s long and I love using the fall colors to enhance my normal every day look at home. I pick up decorating things up all year long when they are on sale. Then when I get everything out to start decorating, usually at the end of August, it’s like Christmas for me. I never remember what I really have until I get into the box and then I’m so excited to put it all out. I never decorate the same when I’m changing the decor out for the seasons, I like to switch it up and add new pieces or move things around a bit.
Dining room fall decor
Since the Fall Equinox is just around the corner, I thought I’d share how I decorated this year for Fall. The Fall Equinox is on 9/22/18 at 9:56 pm. Equinox literally means “equal night.” And during the equinox, most places on Earth will see approximately 12 hours of daylight and 12 hours of night. Not every place will see exactly 12 hours of daylight though. Some places, like Alaska, may see slightly more than 12 hours of daylight on Saturday.
Dining room table fall decor
As the days grow shorter, green leafy trees will start to signal that it’s time for the leaves to change colors. The trees actually stop producing chlorophyll, the green pigment responsible for the leaves’ color and photosynthesis. According to the U.S. National Arboretum, because the color change is more dependent on light than temperature, it takes place at basically the same time year after year. Just a couple of fall equinox facts for you!
Here are a few more photos of my fall decor. I’d love to hear how you decorate for Fall or what some of your Fall traditions are for your family. I’m sure next Fall, once our twins are here, we will be starting new family traditions of our own to celebrate the seasons. I’ll share those traditions as we come up with them. We are so excited to start our own family traditions, like going to pumpkin patches and drinking hot cider on a cool fall evening!